
Intro to POWR Form on Wix
In this article group
- Intro to POWR Forms
- Why Was My POWR Account Deactivated?
- Why Is CAPTCHA Showing Even Though I Disabled it?
- Huge header gap in the mobile version of Formbuilder
- Can I change the language on the individual elements of Address field?
- Is it possible to have a POWR form appear only when the product is selected with the "Buy" button?
- Align checkbox within the forms
- Limit Form submissions in Wix
- I need to add Subsription bar to my site. Which POWR app I can use?
- How can I make the fields required in my form?
- Will I be able to limit form fields to 50 characters?
- Oops! Your POWR form hit the maximum number of admin emails per hour.
- How to change color of label text in my Form Builder?
- Does the Form have Input Validation feature?
- Set a limit or deadline for Form Submissions
- Unlock Venmo, Google Pay and more with "PayPal Complete Payments"
- Form Builder: Elements not visible in IE11
- My POWR App is Taking Too Long to Load
- How to use POWR Form Builder in Shopify POS
- How do I get emotional feedback using Emojis in my form?
- Fixed Positioning in Form Builder
- Why am I getting a form submission error?
- How to add Terms and Conditions to a Form
- Accepting File Attachments and File Uploads with POWR Forms
- How to add Elements to POWR Forms
- Manage memberships with POWR forms
- Can I use Multi-Steps / Pages in my Forms?
- Allow Users to Print your Forms
- How to change date format (US vs. International)
- How to add images to Forms
- Numbers Element in POWR Forms
- How to create Multiple Choice questions in Forms
- How do Conditional Logic elements work?
- Collecting Digital Signatures in Forms
- Can I collect secure information with POWR Forms?
- How do I create side-by-side elements in forms?
- How to change Text Size, Color, or Font in Forms
POWR Forms are a powerful way to collect information from visitors on your website (no coding required) — whether you're capturing leads, gathering feedback, taking orders, payments, or receiving job applications.
The app can be added to any Wix website either directly from the app store or manually with embed code.
This article covers the basics of how POWR Form Builder works, what you can use it for, and how to get started in just a few minutes.
Common Use Cases for POWR Forms
You can use POWR Form Builder for:
Contact forms
Newsletter signups
Order forms (with PayPal or Stripe for payments)
Feedback or survey forms
Appointment or event registration
Job applications
Donations or membership forms
With over 20+ field types and integrations, POWR Forms can be tailored to almost any goal
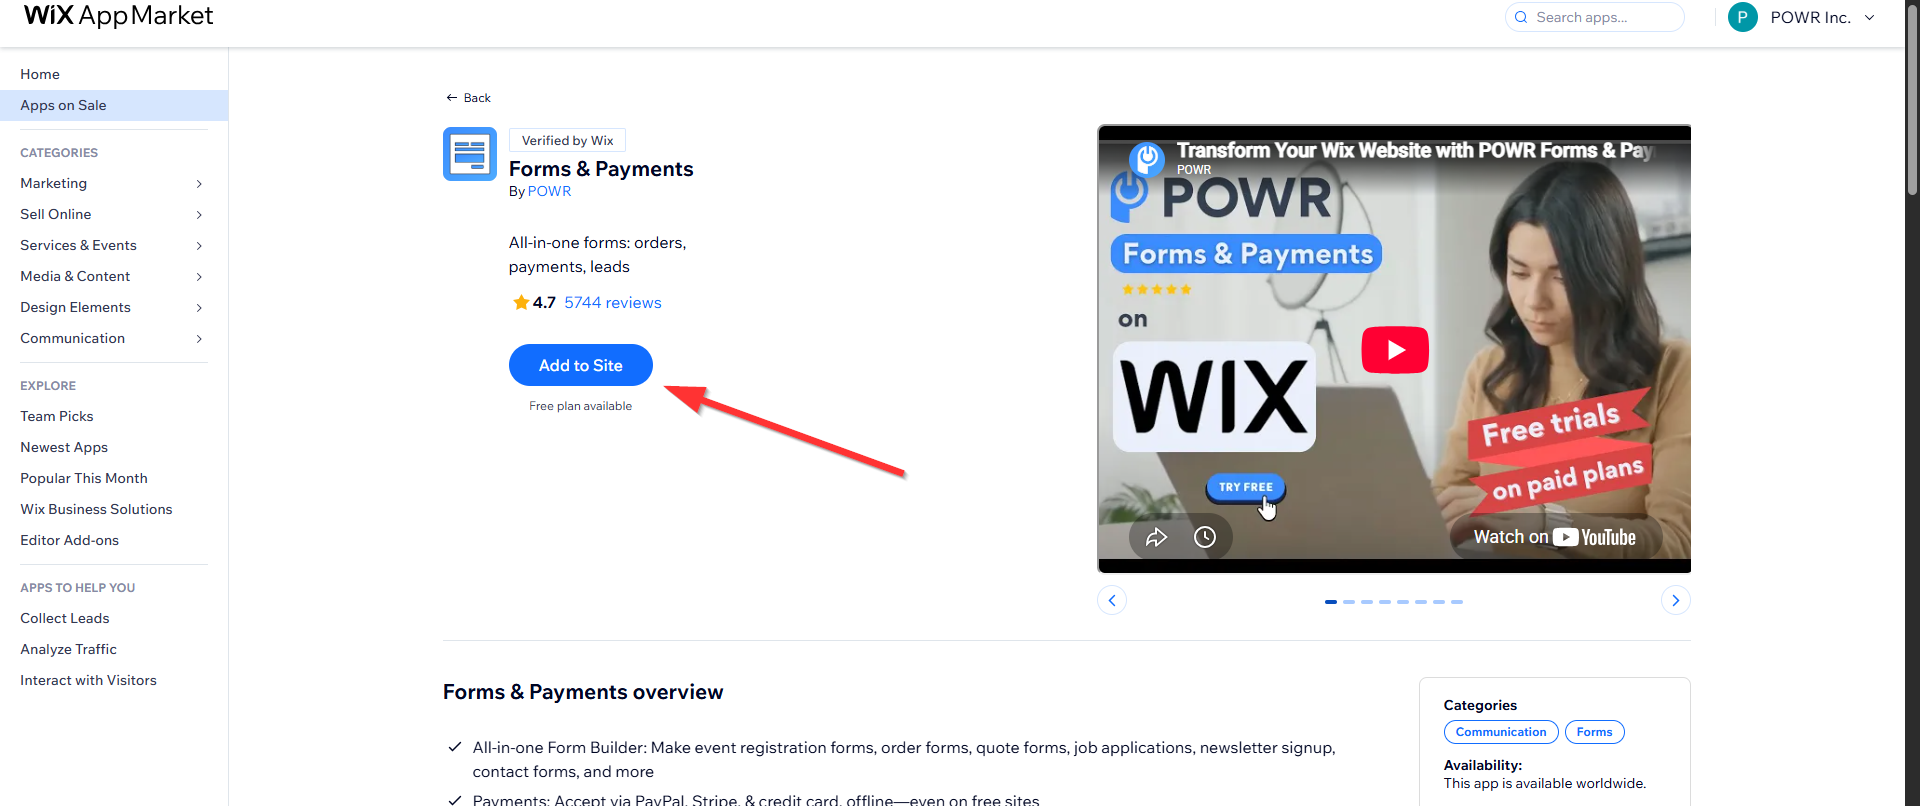
How to Create Your First Form
Add the site from the Wix app store using this link
From the search bar that appears, type "Form Builder" or "Contact Form" to get the app
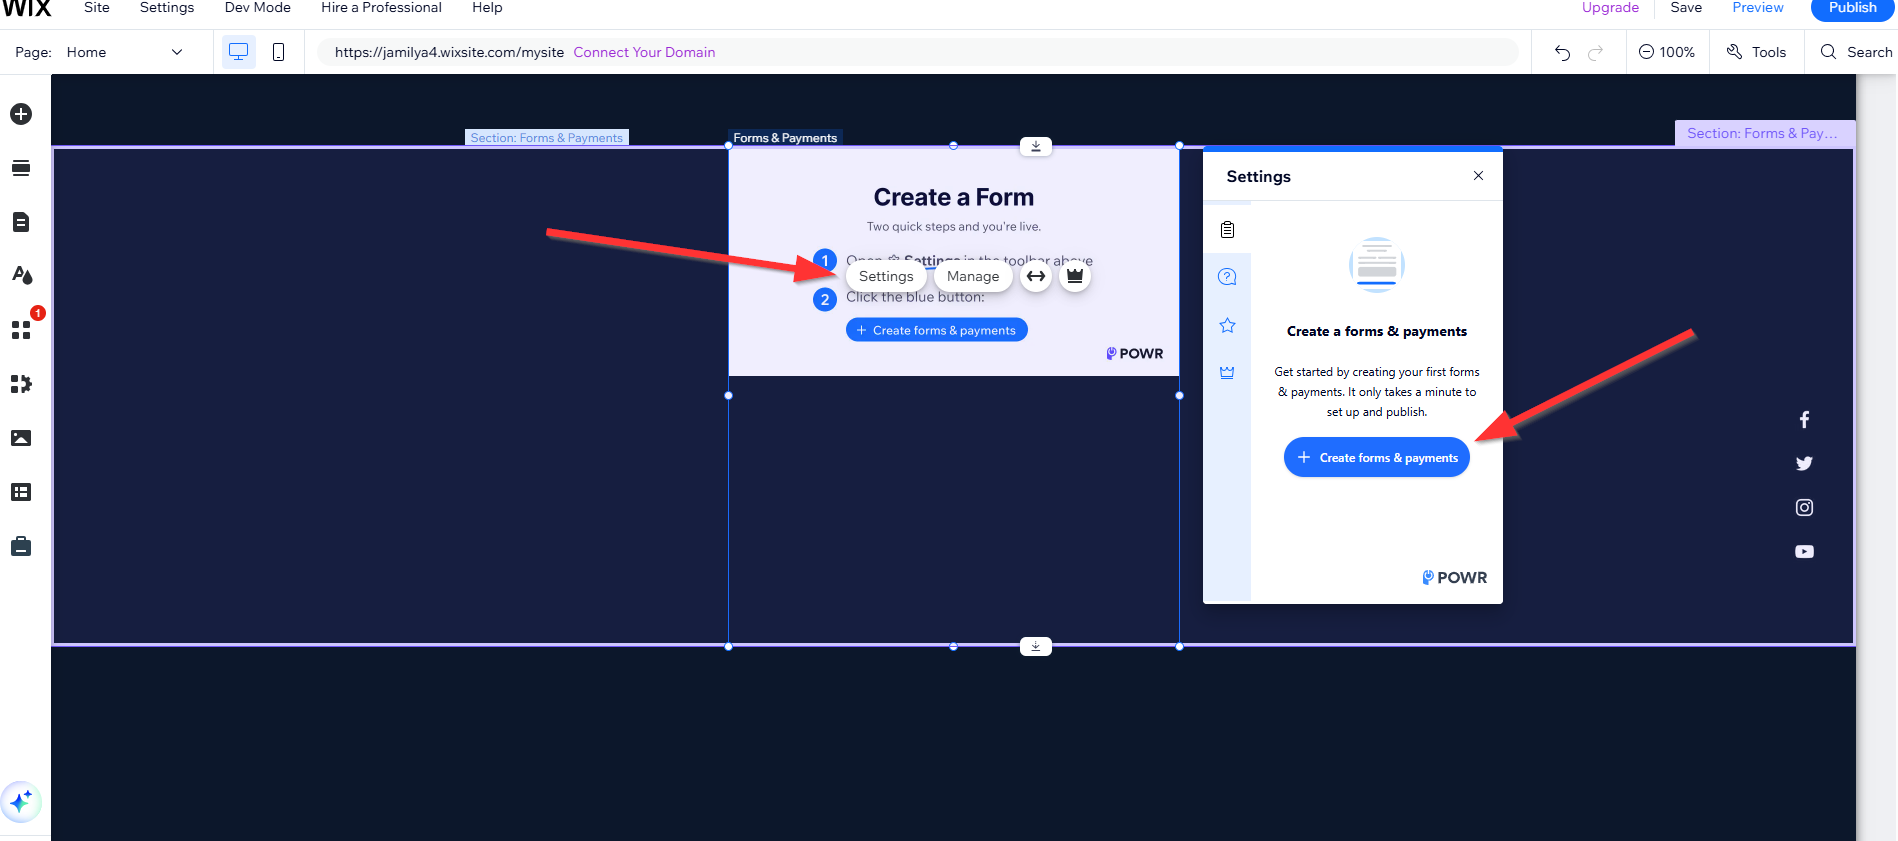
Choose a template or start from scratch
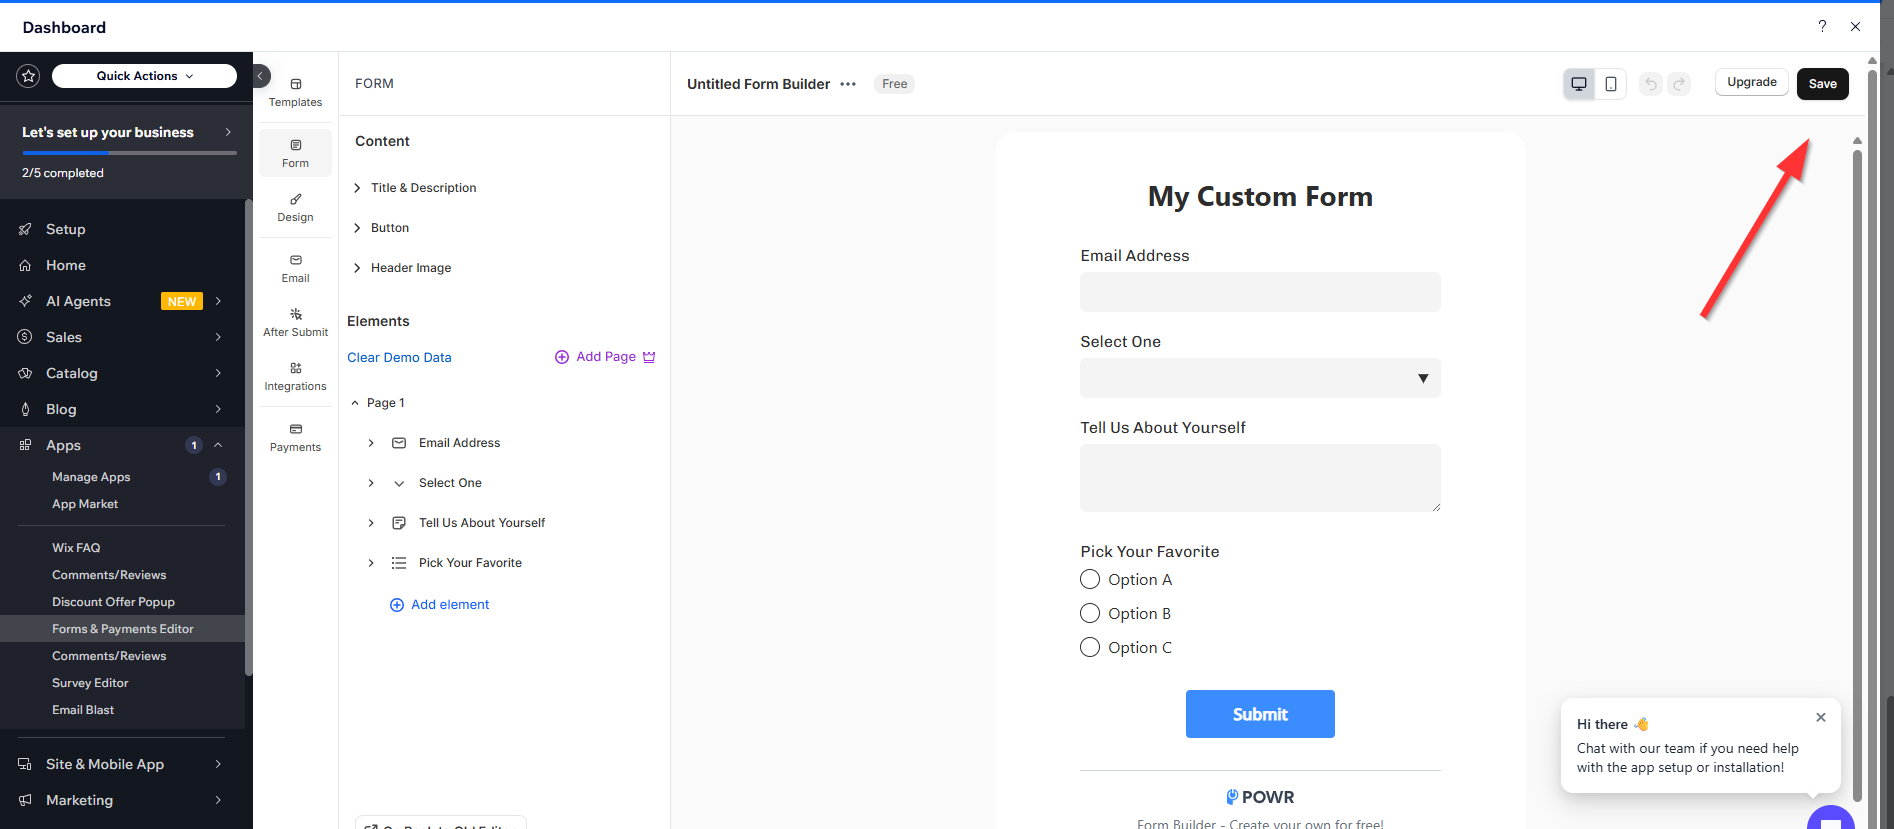
Once in the app editor, use the "Form" tab in left panel to edit and add the fields/elements you need (e.g. Name, Email, Dropdowns, File Upload, etc.).
Click Settings tab to configure email notifications, integrations, behaviors and more.
Click Payment to connect with Stripe and/or PayPal to receive payments, and Design for further customization.
Once you're done editing, click Publish at the top right of the screen, then follow the instructions to install the form on your website or share with others.
Key Features and Benefits
Here are some standout features that make POWR Form Builder popular:
Built-in fields/elements — no technical skills needed
File uploads — allow users to submit images, PDFs, and documents
Payments — collect payments, donations, or orders using PayPal or Stripe
Conditional logic — show or hide fields based on user responses
Autoresponder emails — send instant confirmation emails to users
Multi-page forms — organize longer forms across multiple steps
Integrations — connect with Klaviyo, Mailchimp, Zapier, Google Sheets, and more
Custom design — fully match your brand using layouts, colors, fonts, and button styles
Want to remove POWR branding or unlock advanced features? See POWR Form Pricing here.
Adding Form Elements
Form elements or fields are the basic units of a form. They are the information your visitors will fill out. You can add form elements to collect text, emails, dates, multiple choice answers, numbers, and more. To add a new form element, head to the "Form" tab in the left panel and click Add Element. Then select the type of element you want from the emerging window.
Common Questions
- How do I rearrange elements?
- Can I make certain fields required?
- Can I create multiple choice questions?
- Can I use Multi-steps/pages in my forms?
- Can I change the color of the text?
- Can I limit form fields to 50 characters?
- Can I add images to the form?
- Can I create side-by-side elements?
Setting Up Email Alerts
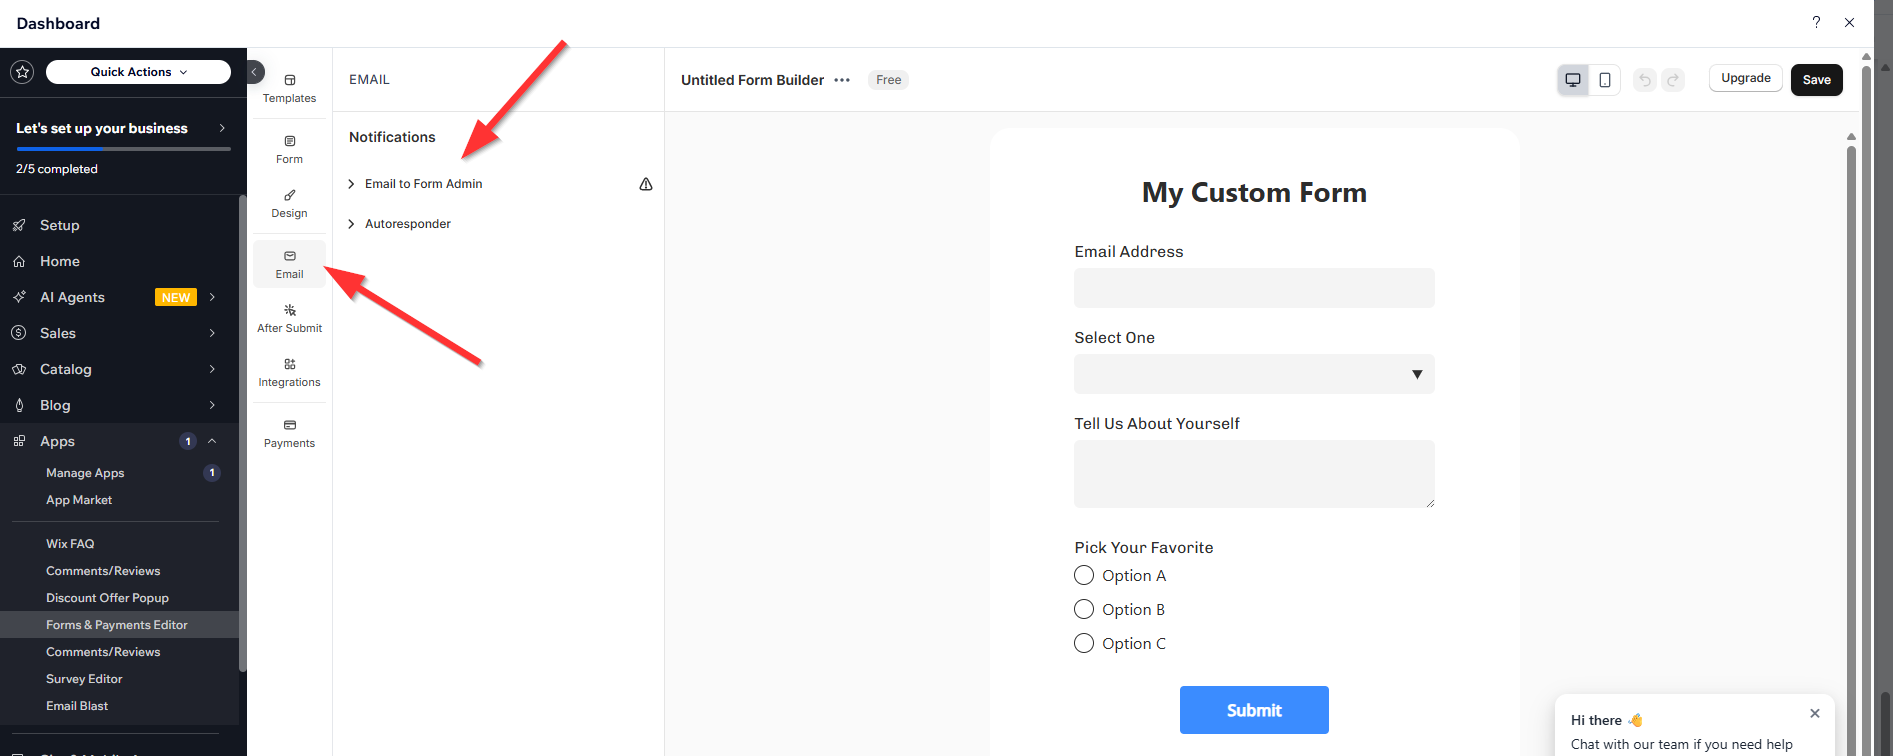
You have the option to receive instant notification emails when a visitor fills out your form and for any abandoned payement. You can set this up under the Settings --> Notifications --> Email to Form Admin by entering your email address. A confirmation email will then be sent right away. If not, try to remove and re-enter the email or contact support.
Common Questions
- Where can I view and export my form responses?
- I'm not receiving the email alerts
Requiring Payments
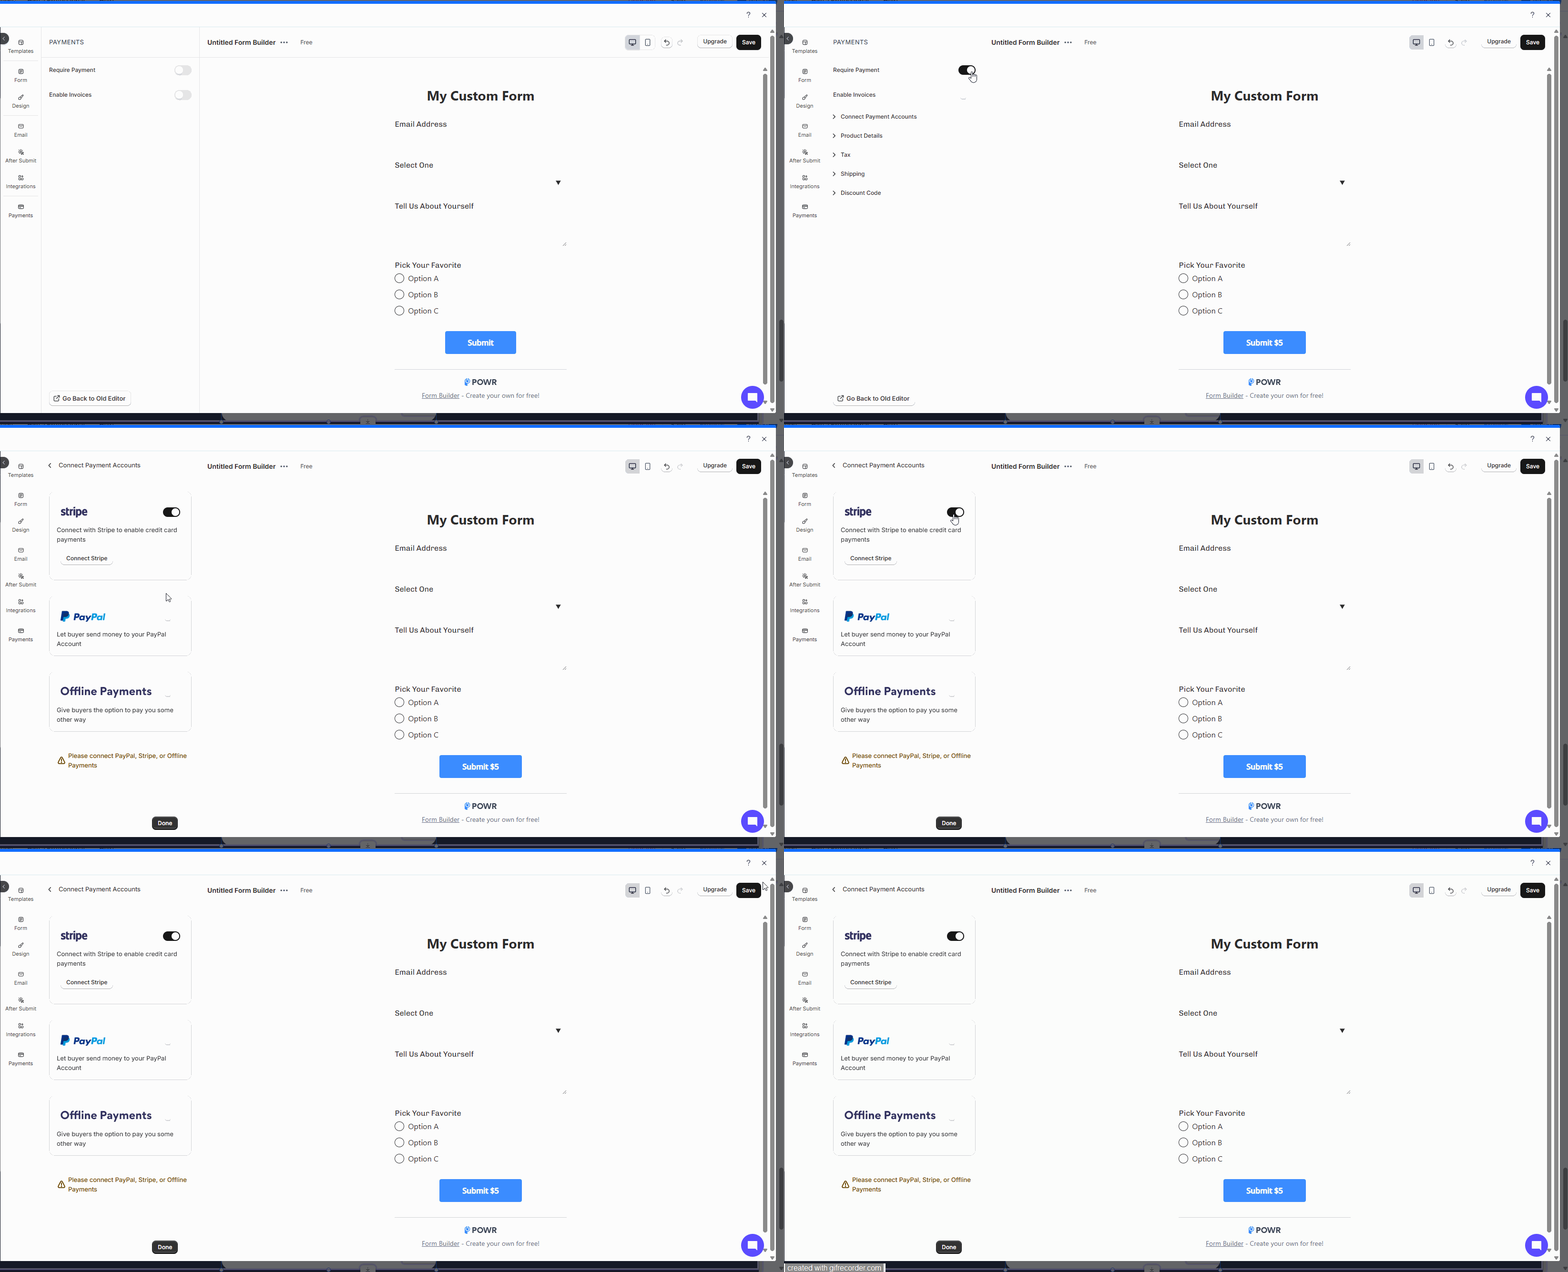
With POWR forms, you can accept payments through Stripe and PayPal either as fixed costs or subscription based pricing. Just toggle on the Require Payment option under the Payment tab to connect your Stripe/PayPal account. Click into each of the sections to fill out the necessary details to sell your product or service. The payment type (one-time payment, donation or recurring subscription) can be selected from the Product details section.
Common Questions
- How do I sell subscriptions?
- How do I add different pricing options?
Integrations
Still under the Settings, we offer a list of integration options such as Google Sheets, Klaviyo, Mailchimp, Zapier, Shopify Customers or Wix. However to ensure a seamless integration, we've launched our new Email Marketing app to help you create and grow your mailing list directly from your form submission contacts. Try it out today for free and send up to 10,000 emails per month!
Common Questions
Conditional logic
Conditional logic is a feature that allows you to create dynamic, personalized forms that respond to a visitor’s choices in real time. Instead of showing every question up front, you can reveal specific follow-up fields only when they’re relevant — making your form shorter, smarter, and easier to complete.
Think of conditional logic like a branching tree: Each answer a user selects sends them down a different “branch” of the form, unlocking new questions or hiding ones that don’t apply.
Currently, you can create conditional rules based on multiple-choice elements such as Dropdown, Multiple choices, Checkbox.
Common Questions:
- How do I set up conditional logic?
- How can I control emails or redirects with conditional logic?
Need Help?
If you need any help or have any questions about our Form Builder, our support team is happy to help.
👉 Contact our support team
When contacting us, you'll be prompted to authenticate your email by signing in, and a confirmation code will be emailed to you. This helps ensure our support team's reply will be delivered to you with no issues.
For more information about available features, visit our Pricing Page:
https://www.powr.io/pricing