POWR Popup helps you capture attention, drive conversions, and deliver important messages to your website visitors — all without writing a single line of code.
Whether you’re building an email list, announcing a sale, or reducing cart abandonment, our Popup is a powerful way to boost engagement.
This article contains the following topics:
- What is POWR Popup?
- How to create, manage and publish your Popup?
- Common use cases
- Key features and benefits
- Need help? Contact Support!
What is POWR Popup?
Our Popup is a customizable tool that lets you display a popup message on your site based on user behavior or timing. You can set the popup to trigger based on exit intent, scrolling, specific delay, etc — and therefore control exactly who sees them.
It works on all major platforms including Wix, Shopify, Squarespace, WordPress, BigCommerce, and more.
How to Create, Manage and Publish your Popup?
- From your POWR dashboard, click Create New App and find the Popup
- Find the Popup from the search bar that shows up, and click "Get app"
- Once you're in, pick the a pre-built template of your choice or start from scratch
- Customize the popup content, design and controls.
- Once finished, click "Publish" at the top right of the screen and follow the instructions to install the app on your site (you'll have the
The Popup can be installed either automatically if installed directly from your platform marketplace (Shopify, BigCommerce, Weebly, etc) or manually with embed code if you want even more control on the installation.
Common Use Cases
You can use POWR Popup for a wide range of business goals, including:
- Email capture – grow your newsletter or mailing list
- Promotions – highlight discounts, coupon codes, or sales
- Exit intent – reduce bounce rate by showing a last-minute offer
- Announcements – share updates, hours of operation, or shipping alerts
-
Lead generation – collect signups for demos, webinars, or trials
Key Features and Benefits
POWR Popup includes a range of flexible features to match your brand and goals:
- Custom design – change colors, fonts, layout, and animations
- Advanced Controls – schedule and show popups on timing, click, scroll, exit, etc
- Autoresponder emails – send instant follow-ups after submission
- Third-party Integrations – connect with Mailchimp, Klaviyo, Google Sheets
- Urgency and Social Boost - embed our Coutdown Timer and/or Social Icons apps
- Coupon code upon sign up – share a coupon code only after your visitors sign up
Want to remove POWR branding or unlock advanced features? Visit our Pricing Page for full plan details.
Advanced Controls
Under the Controls tab, you can find multiple sections such as Display, After Submission, Integrations and Advanced.
- The Display Options provide the options to set a schedule and trigger for the popup (e.g you might want to schedule it to show only Once a day per visitor and set it to trigger only after the visitors spend 15 seconds on the website)
- Under After Submission, you can add your email in order to receive instant alert for each new submission received, and also customize an autoresponder to be sent to those who submitted.
- Integrations: We provide a list of third party apps that can be integrated with the Popup including our new Email Marketing app to help you create and grow your mailing list directly from your popup submission contacts. Try it out for free and send up to 10,000 emails per month!
You can also connect to multiple other third-parties via our direct integration with Zapier
- From the Advanced section, the popup can be paused temporarily whevener needed until you wish to set it live again. Just one click to turn it on or off!
If the popup is created with a different language, the Error message section can be used to ensure everything is fully translated.
Urgency and Social Boost
You can integrate our Social Media Icons and Countdown Timer apps inside your Popup to add urgency to your call-to-actions and increase your social following.
How can I add a coupon code to a POWR popup?
In order to make your coupon code available only after the visitor signs up with their email go to the Success tab > Add element > Coupon.
Once the coupon element is added, you can customize the code and design as needed. This proccess will therefore show the code only in the success screen to ensure only the visitors who sign up have access to copying the code.
It's also recommended to register that same coupon code on your platform (Shopify, Wix, etc) to make sure it applies successfully.
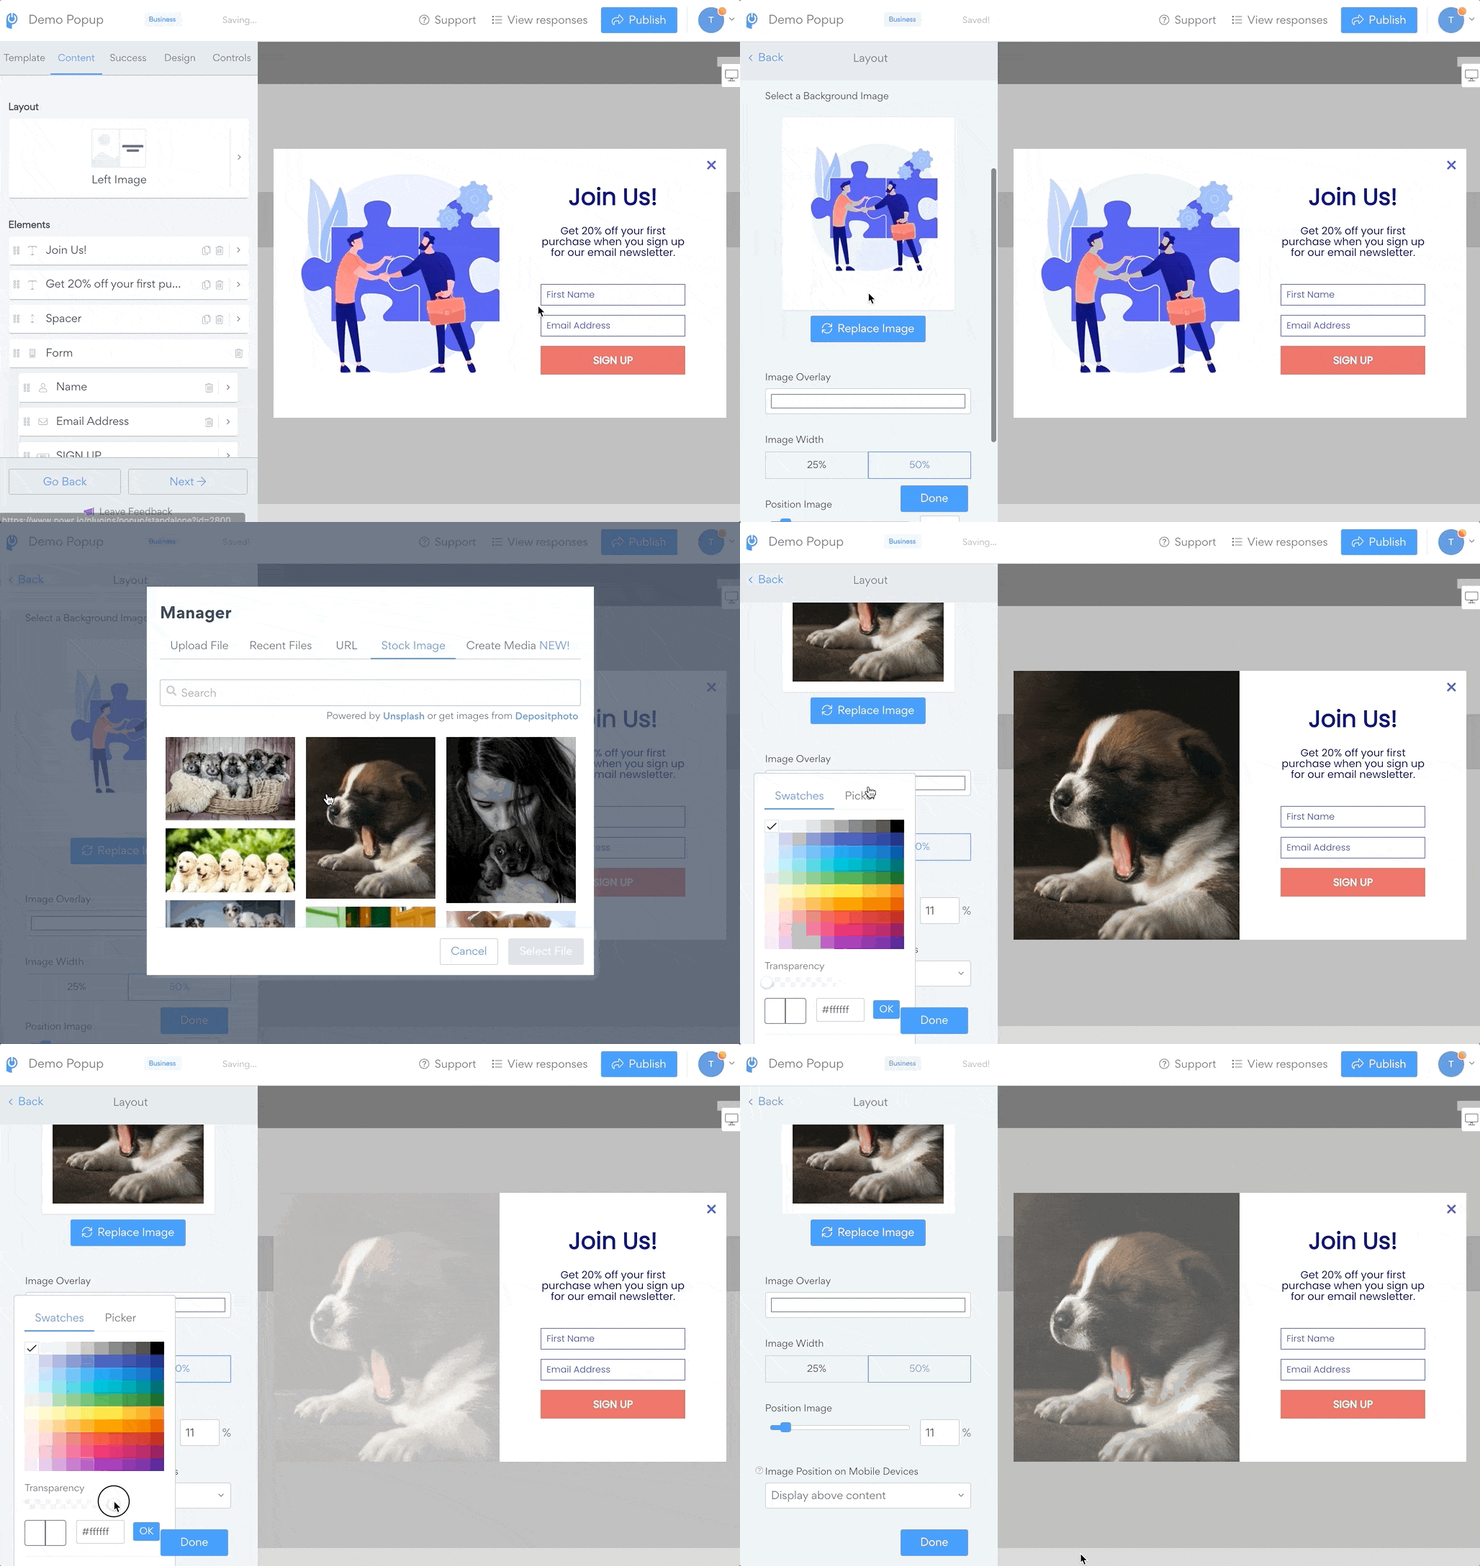
Adding left, right, or background images to POWR Popup
To customize popup with your own images, please follow the steps below:
- Open Popup settings
- Select a template
- Click on the "Content" tab
- Open the "Layout" section
- Scroll down a little bit and you will see the place where background images can be added
- Press on "Replace the image" button
- You can also add an Overlay with transparency to match your Popup's aesthetic
- Publish the app to save the changes

Need Help? Contact Support
If you're having trouble building your form or need help with advanced setup, we're here for you.
Click here to contact our support team
Want to explore premium form features and unlock integrations? Visit our Pricing Page to compare plans.

Comments
0 comments
Please sign in to leave a comment.