
How to Install POWR Apps Manually to Custom Locations on Shopify
POWR apps can be added to your Shopify store in just a few minutes. Depending on where you want the app to appear, you can install it in two ways:
Automatic Installation (Recommended) – Adds the app to common locations like your homepage, product pages, collections, or cart.
Manual Installation with Custom Liquid – Allows you to place the app in a specific location inside your Shopify theme.
This guide walks you through both options so you can choose the best method for your store.
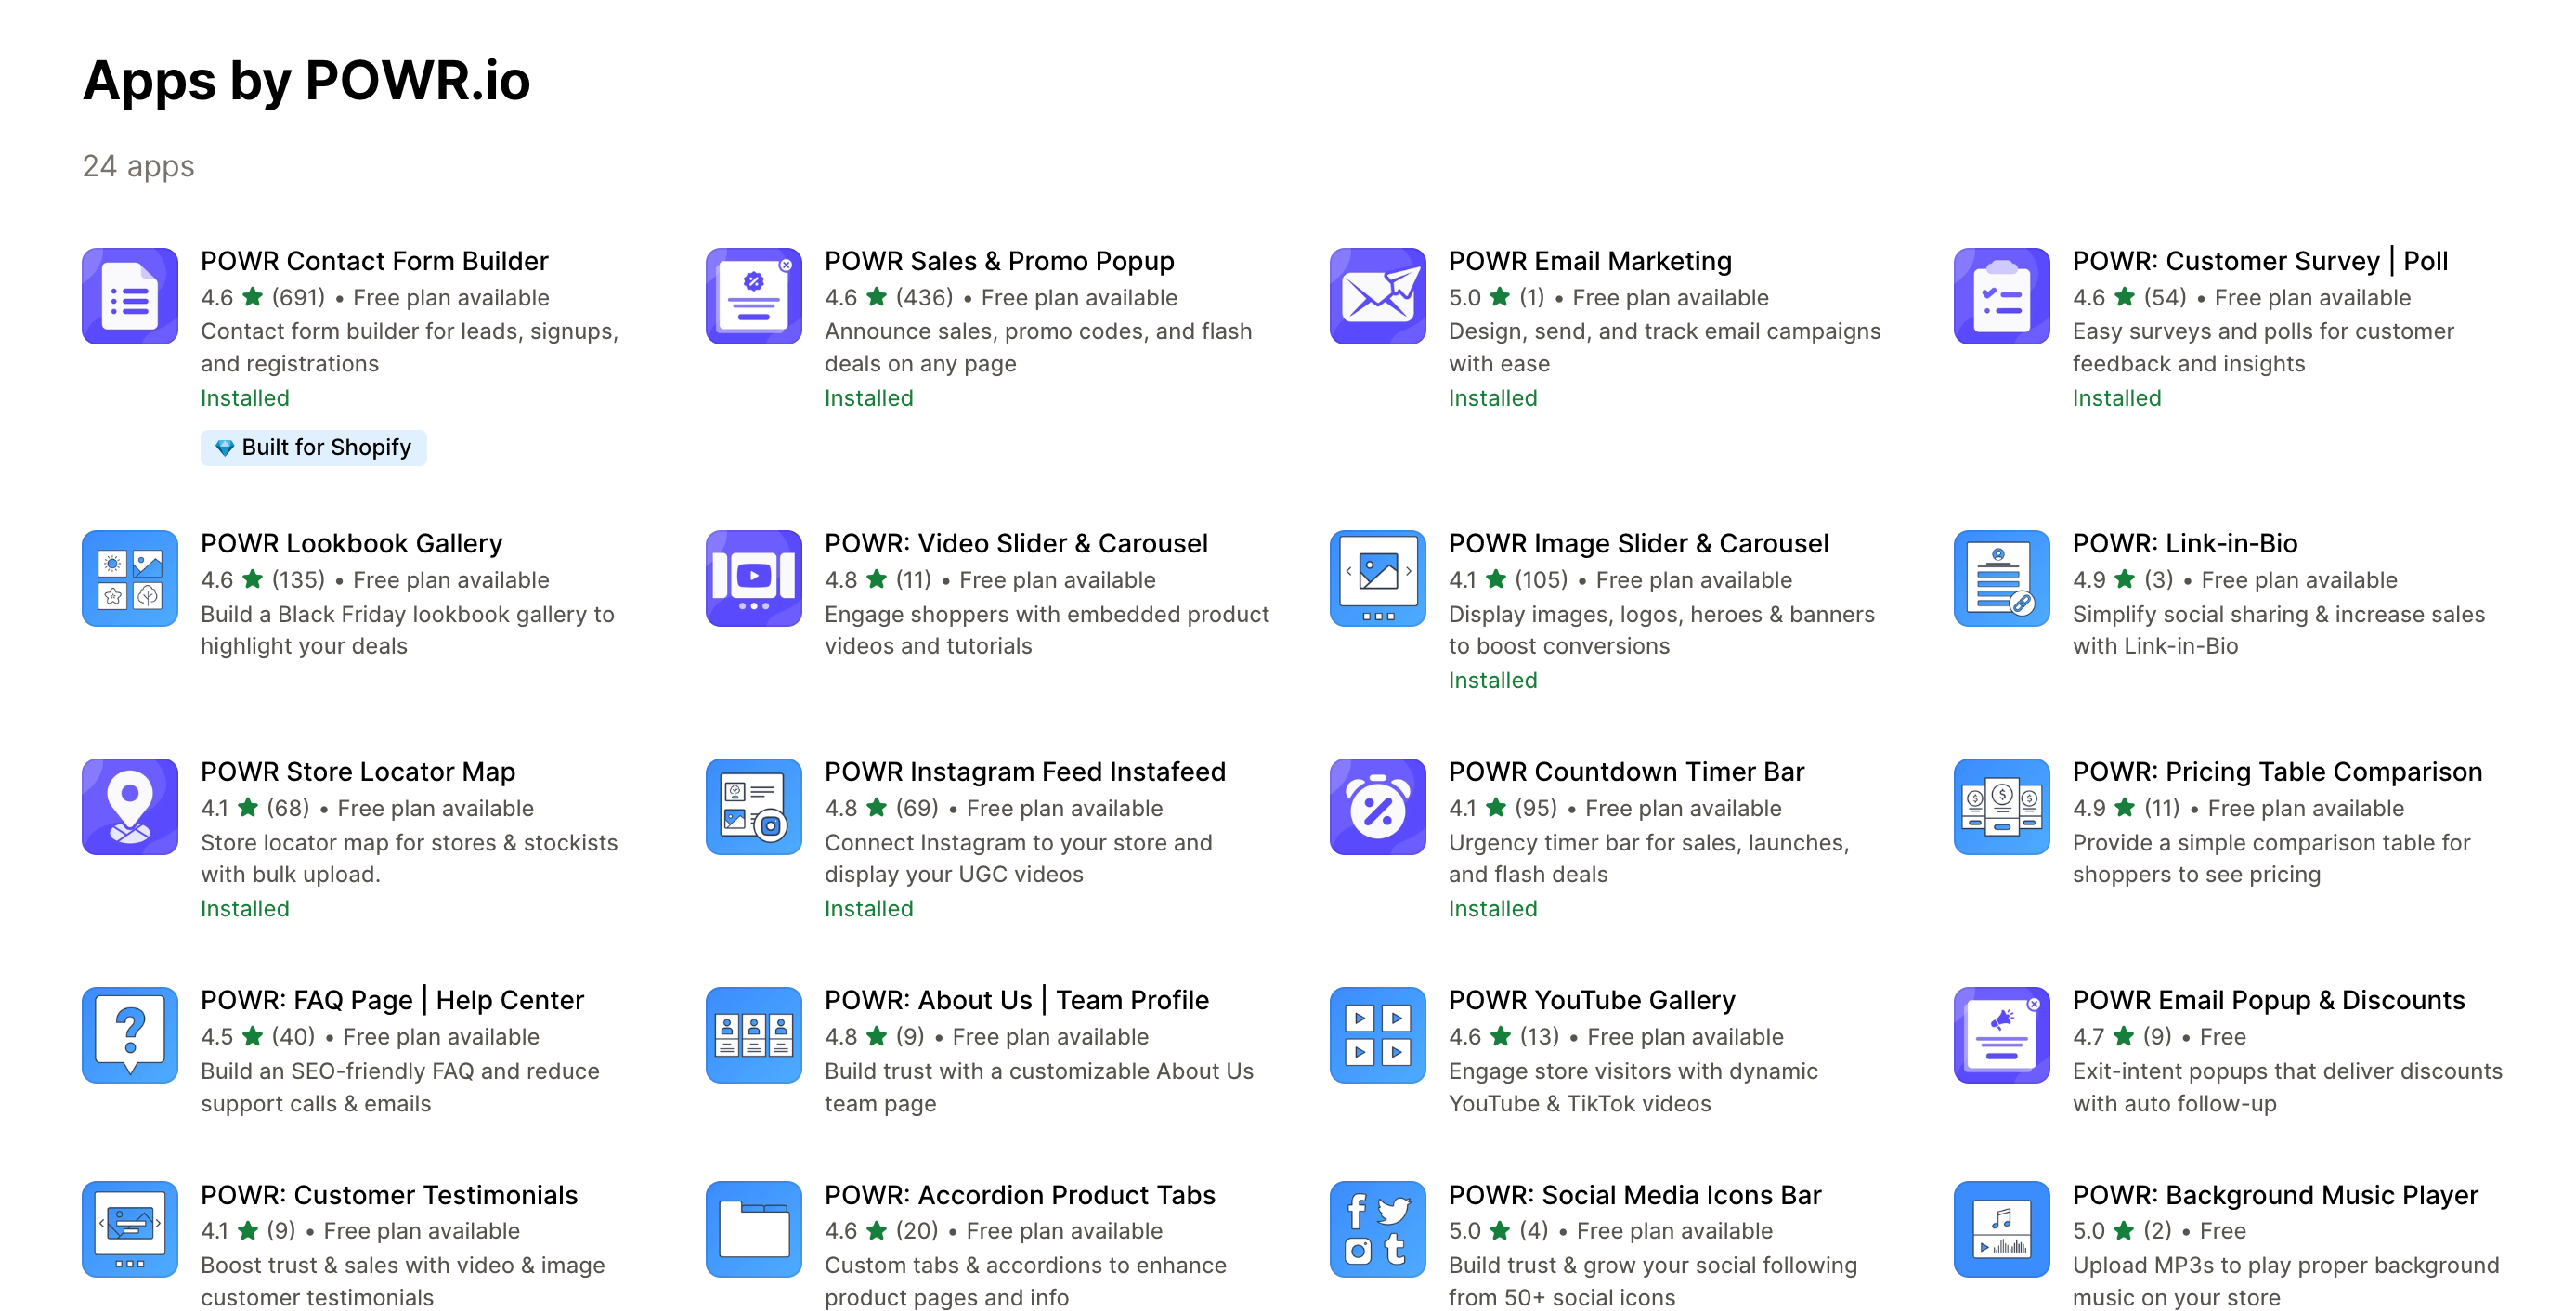
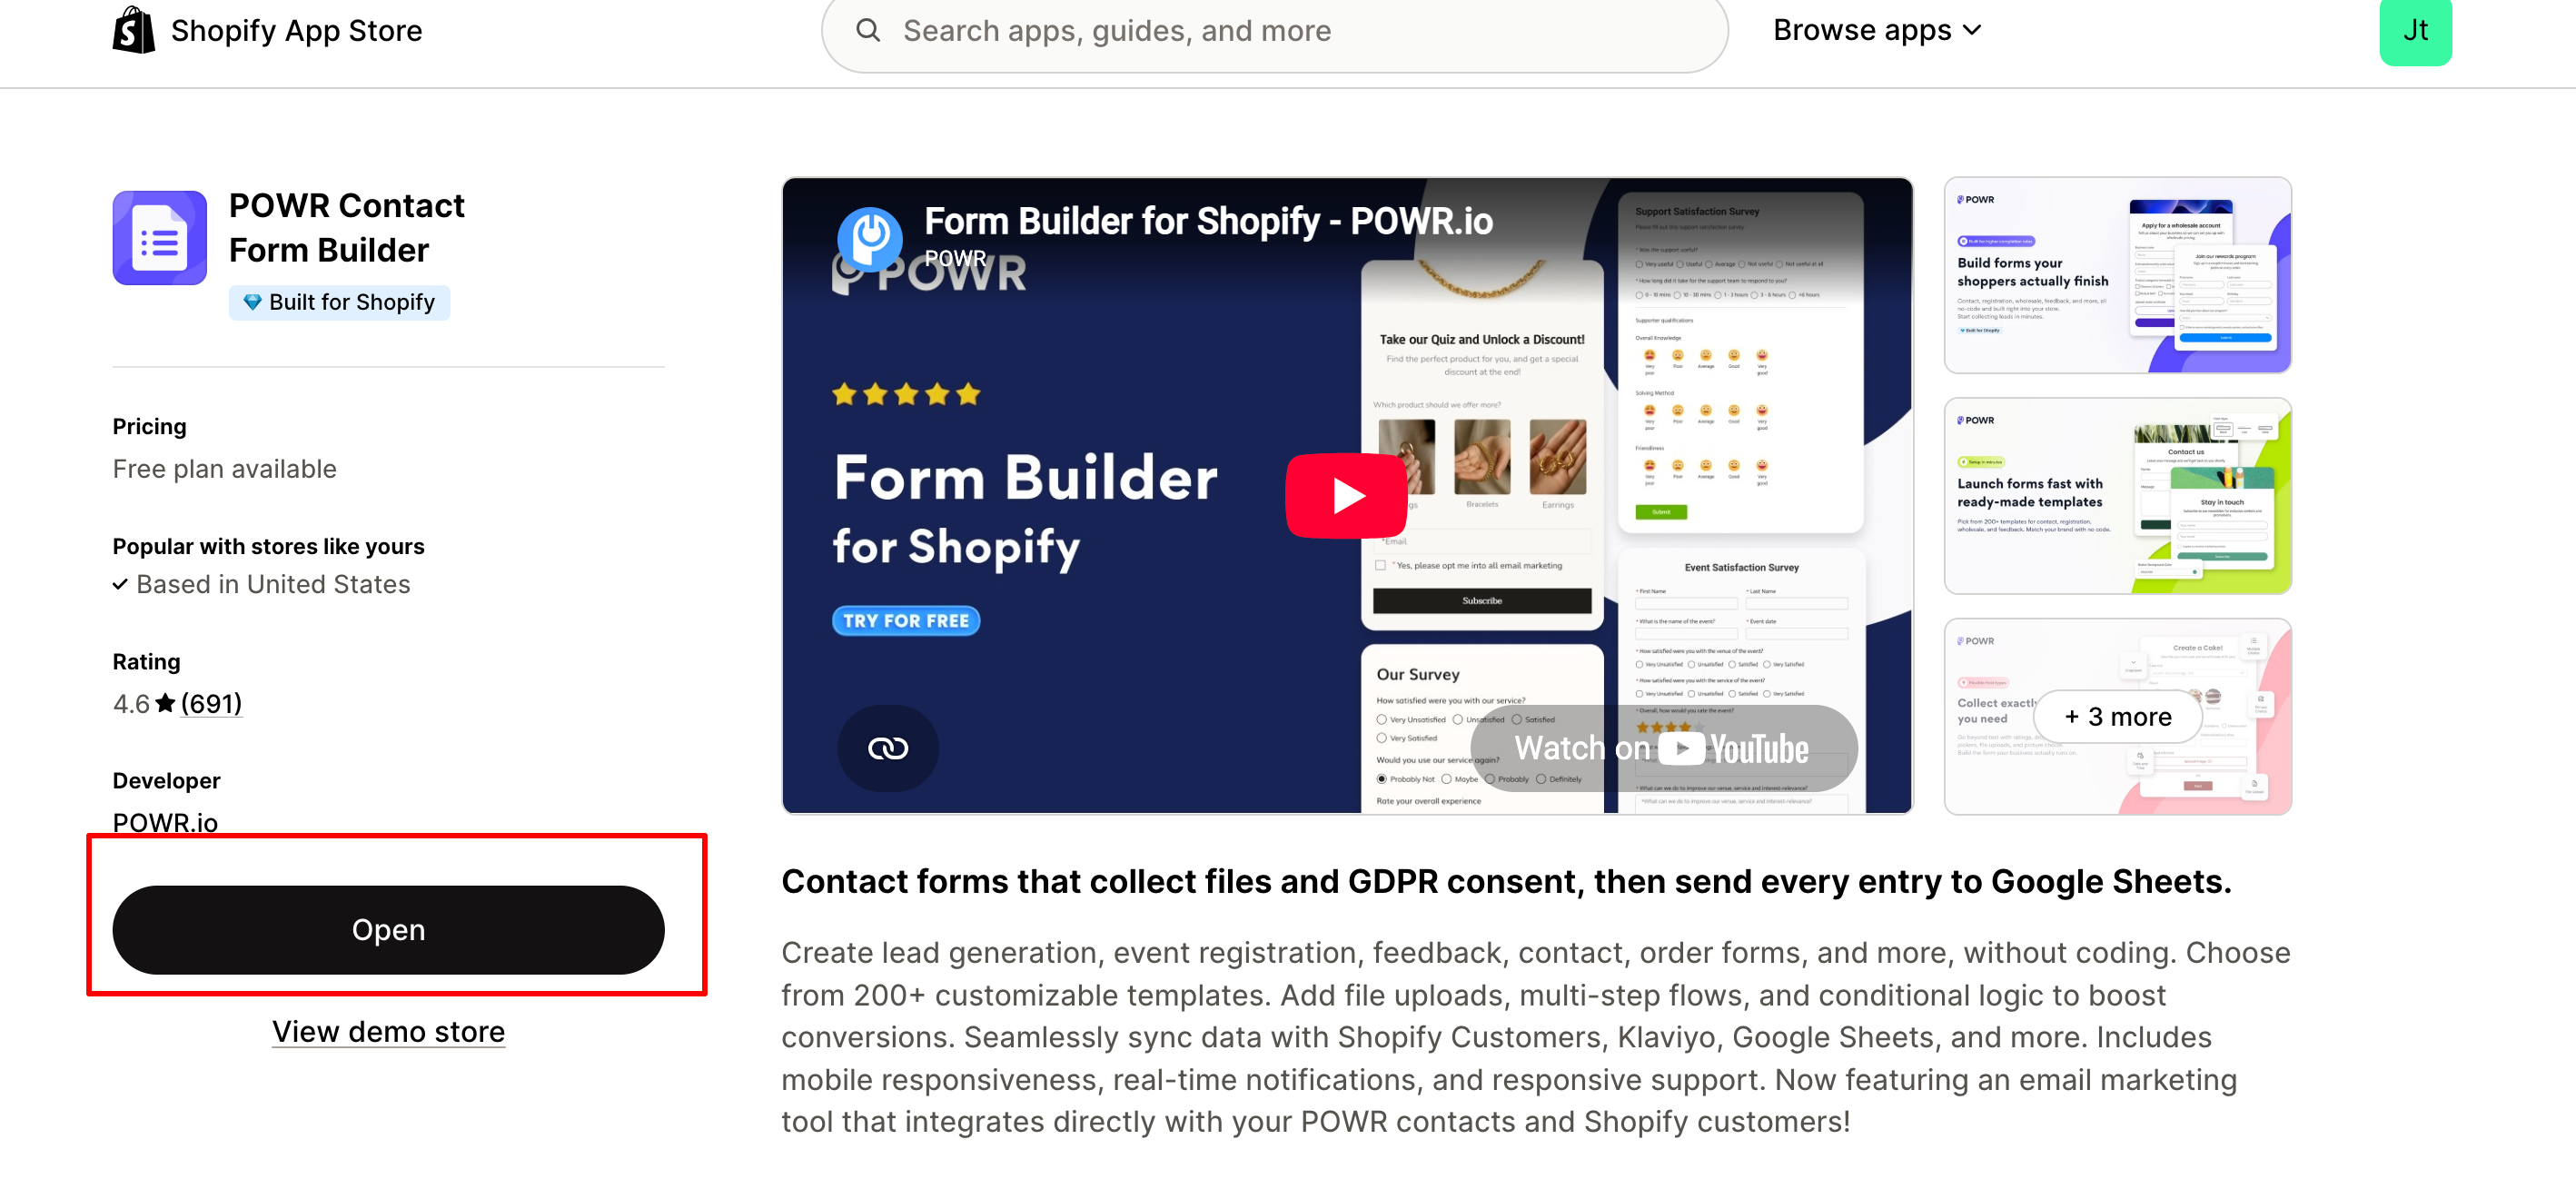
Install a POWR App from the Shopify App Store
Before installing the app on a page, you first need to add it to your Shopify store.
Go to the Shopify App Store and search for the POWR app you want (Form Builder, Popup, Image Slider, etc.).
Click Add App.
Approve the installation permissions.
You will be redirected to the POWR Editor, where you can choose a template or start from scratch.
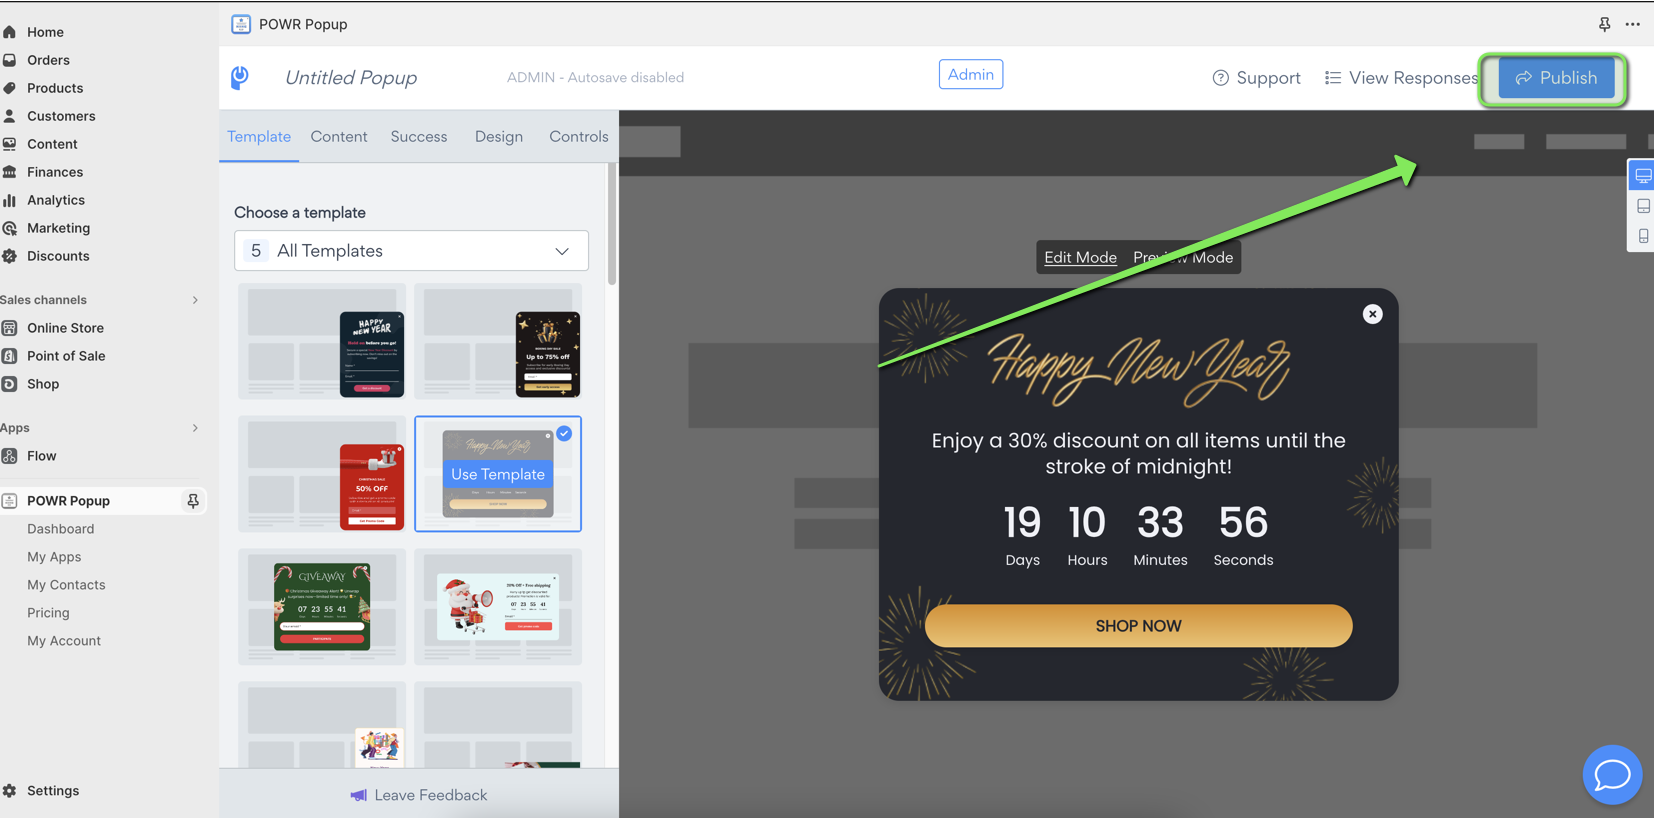
Once you've customized your app, click Publish to install it on your store.
Method 1: Automatic Installation (Recommended)
Automatic installation is the easiest way to add a POWR app to your Shopify store.
Step 1: Publish Your App
In the POWR Editor:
Click Publish in the top right corner.
Select the page where you want to install the app.
You can install the app on:
Homepage
All Product Pages
All Collection Pages
Cart Page
Custom Pages
You will also choose whether the app appears at the top or bottom of the page.
Click here to learn more on how to install powr apps
Step 2: Open the Shopify Theme Editor
After choosing the page location:
Click Install in your Shopify Theme Editor.
Shopify will open your Theme Editor in a new window.
Step 3: Confirm Installation
Inside the Shopify Theme Editor:
Locate the POWR app section.
Make sure the section toggle is enabled.
Click Save in the top right corner.
Your app will now appear on your live Shopify store.
Special Step for Collection Pages
When installing on Collection pages, Shopify requires an additional step.
Copy the App ID shown on the POWR publish screen.
In the Shopify Theme Editor, click the POWR app section.
Paste the App ID into the field that appears.
Click Save.
This connects the collection template to your specific POWR app.
Method 2: Manual Installation with Custom Liquid
If you want to place the app in a specific location inside your Shopify theme, use manual installation.
This is useful when you want to install the app:
Inside a specific section of a page
Between existing theme elements
On a custom template or layout
In a precise position on a product or page
Click here to learn more about manual installation
Step 1: Copy the Embed Code
Open your app in the POWR Editor.
Click Publish.
Select Install with Custom Liquid Code.
Copy the embed code provided.
Step 2: Add the Code to Shopify
Go to Shopify Admin → Online Store → Themes.
Click Customize.
Navigate to the page where you want the app installed.
Click Add Section.
Select Custom Liquid.
Paste the POWR embed code.
You can drag the section to adjust where the app appears.
Step 3: Save Your Theme
Click Save in the Shopify editor.
Your POWR app will now appear in the location you selected.
Where You Can Install POWR Apps on Shopify
POWR apps can be installed on:
Homepage
Product pages
Collection pages
Cart pages
Custom pages
Blog pages
Custom theme sections
Manual installation gives you full control over positioning.
Troubleshooting Installation Issues
If your app does not appear on your store, check the following:
The app was not saved in the Shopify Theme Editor Make sure you clicked Save after enabling the section.
The page template is different Some Shopify themes use different templates for pages, products, or collections.
Browser caching Try refreshing your page or clearing your browser cache.
The app was not published Return to the POWR Editor and confirm you clicked Publish.
How to Install a POWR App on All Pages
After you've finished customizing your app,
Click the 'Publish' button in the top right corner
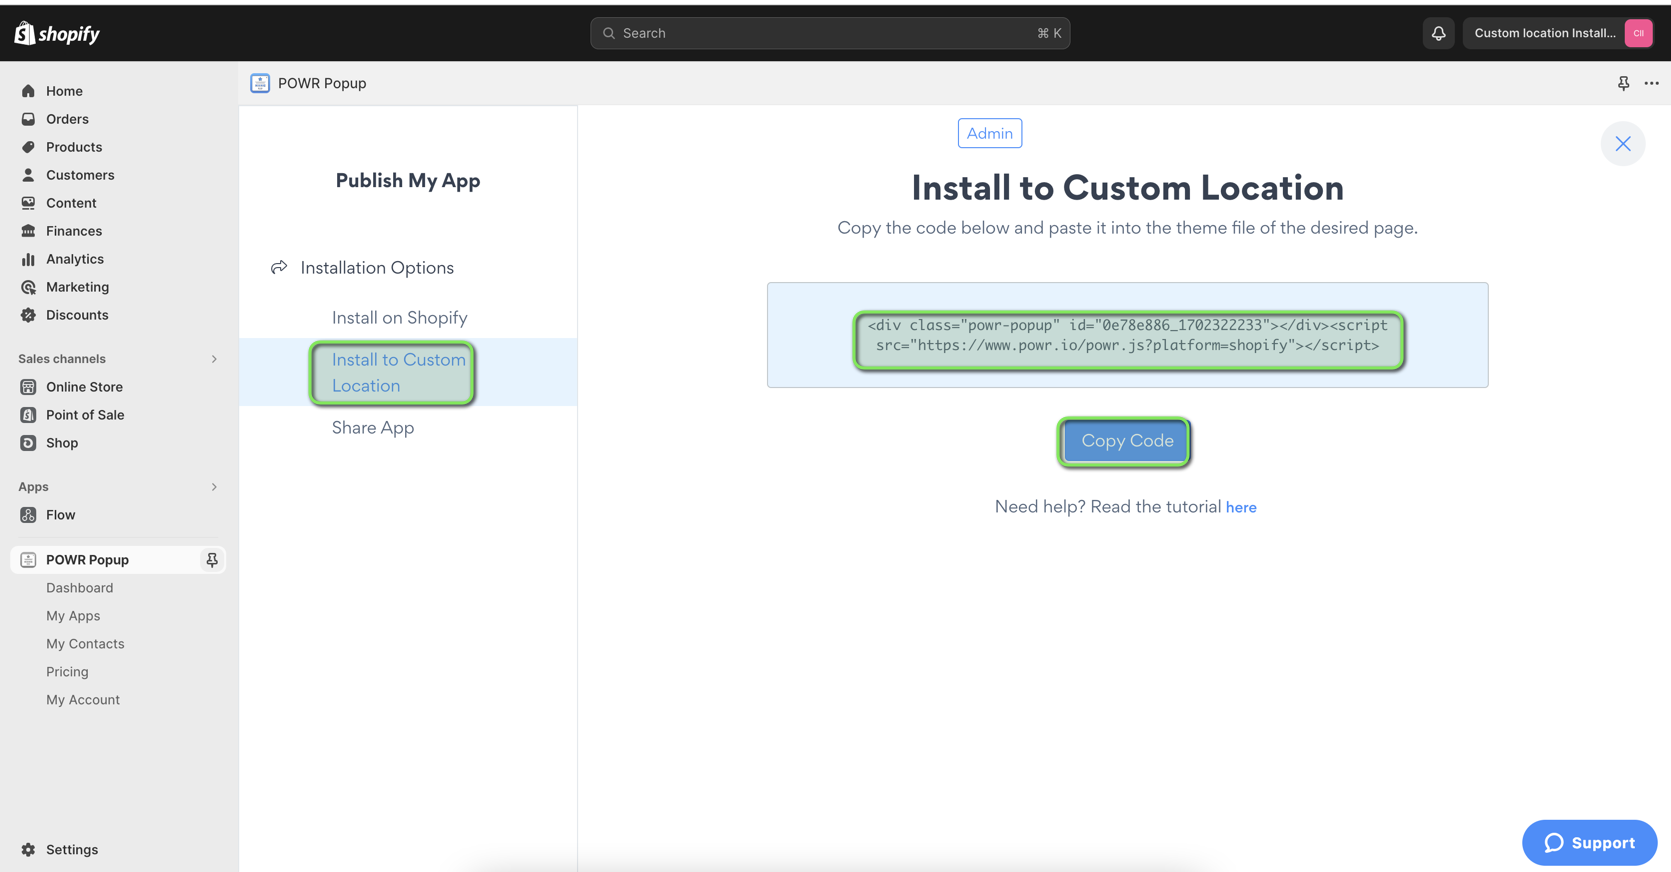
Choose 'Install to Custom Location'
Click 'Copy Code'
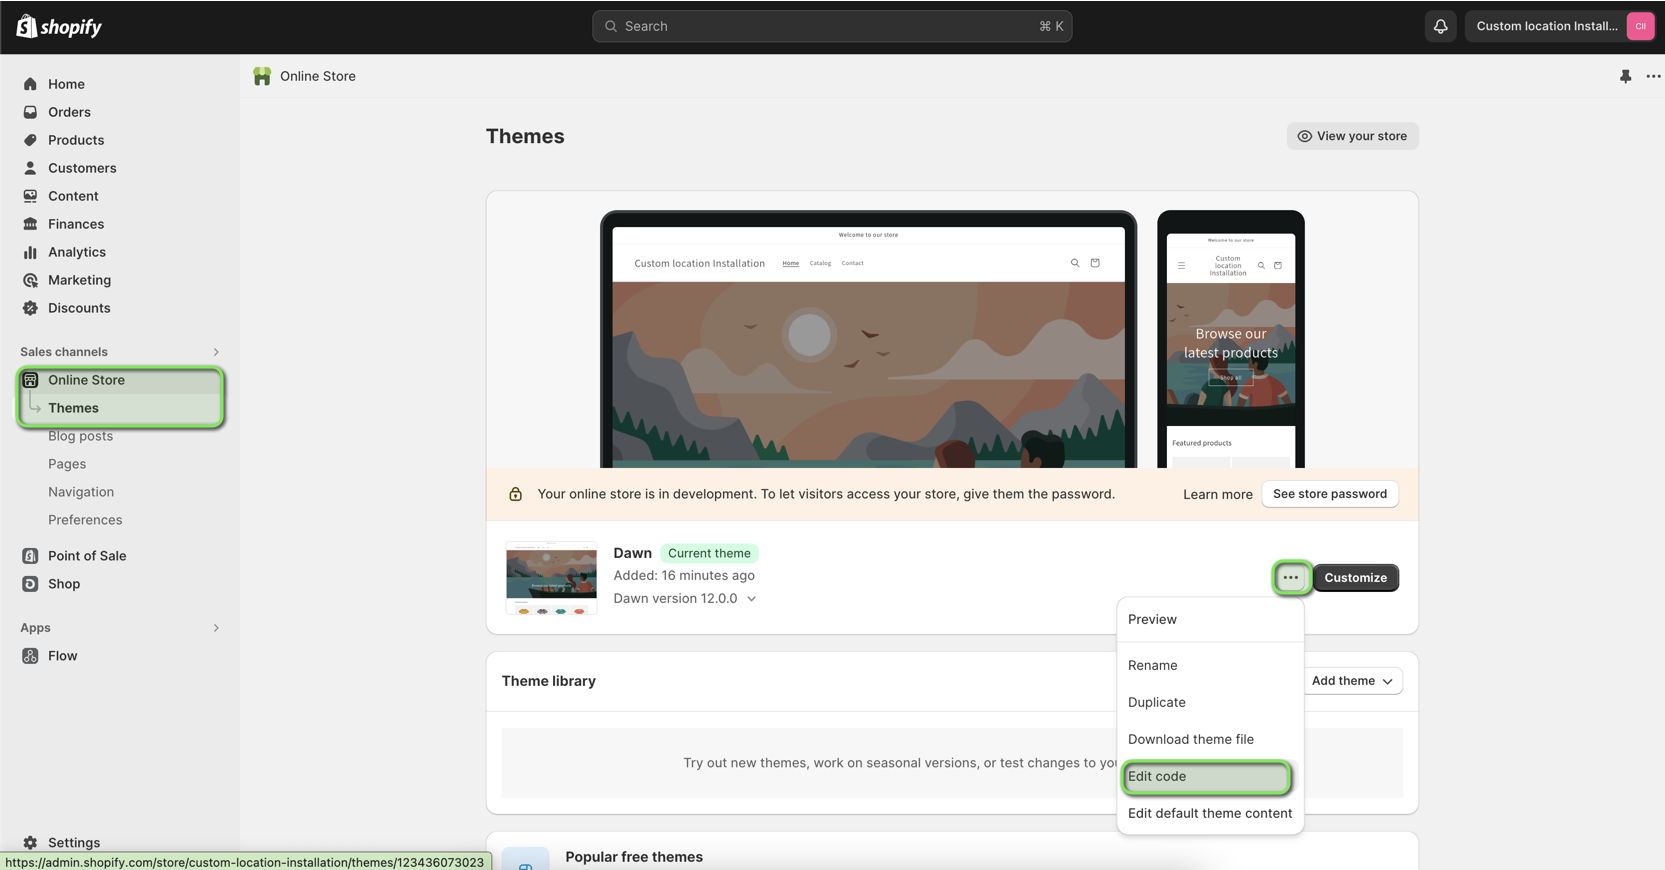
From the Shopify admin in the left navigation:
Online Store
Themes
Edit code
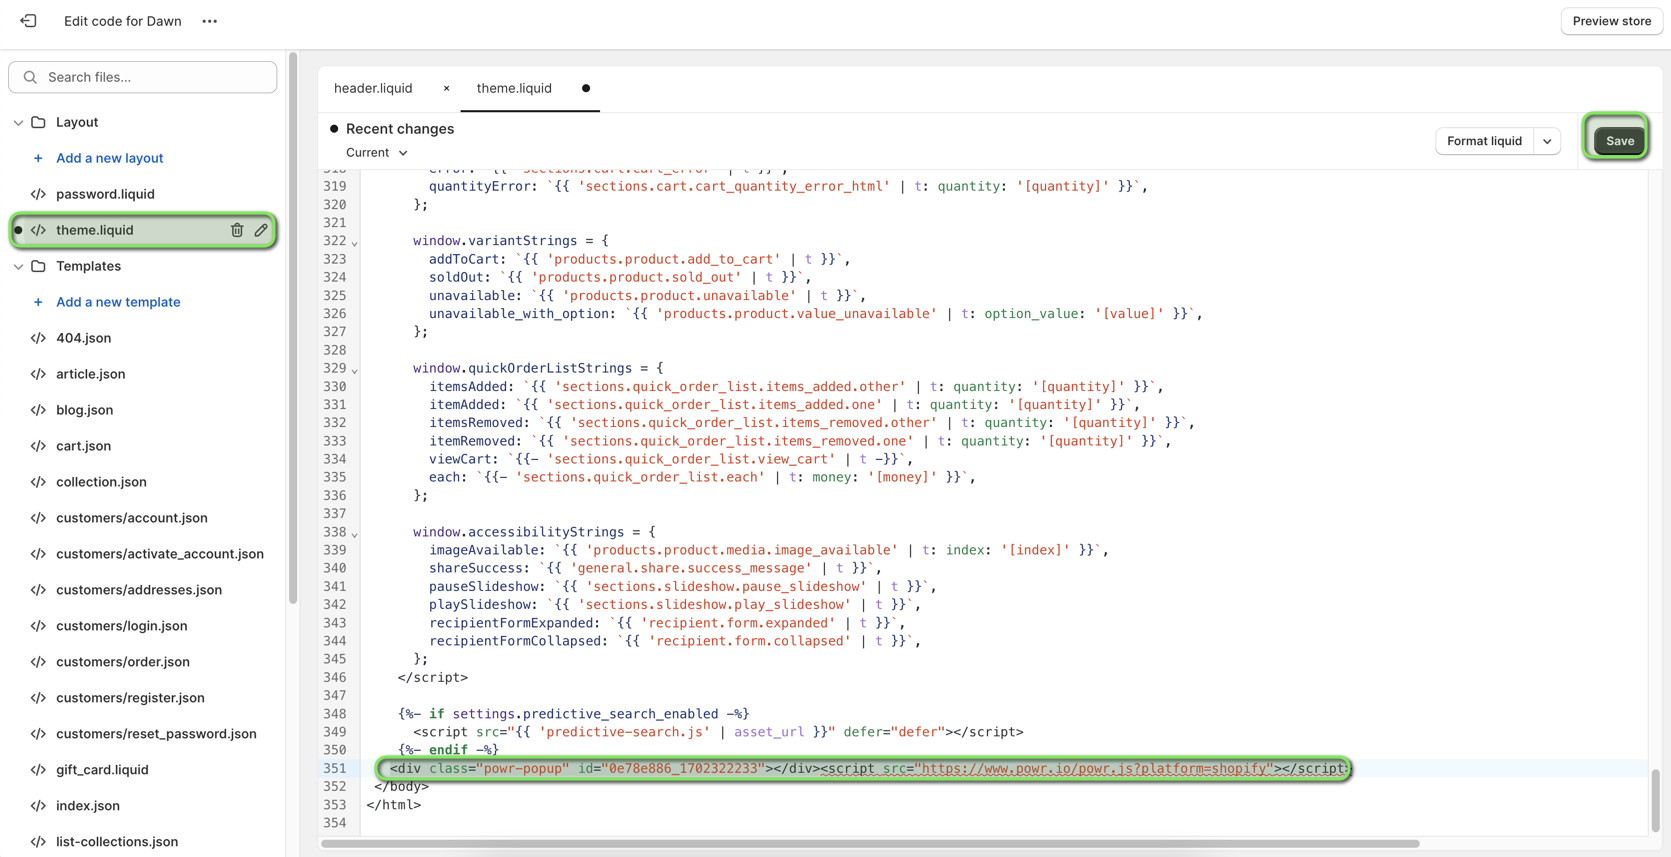
Find theme.liquid
Scroll down to the bottom
Paste POWR embed code before tag
Click Save
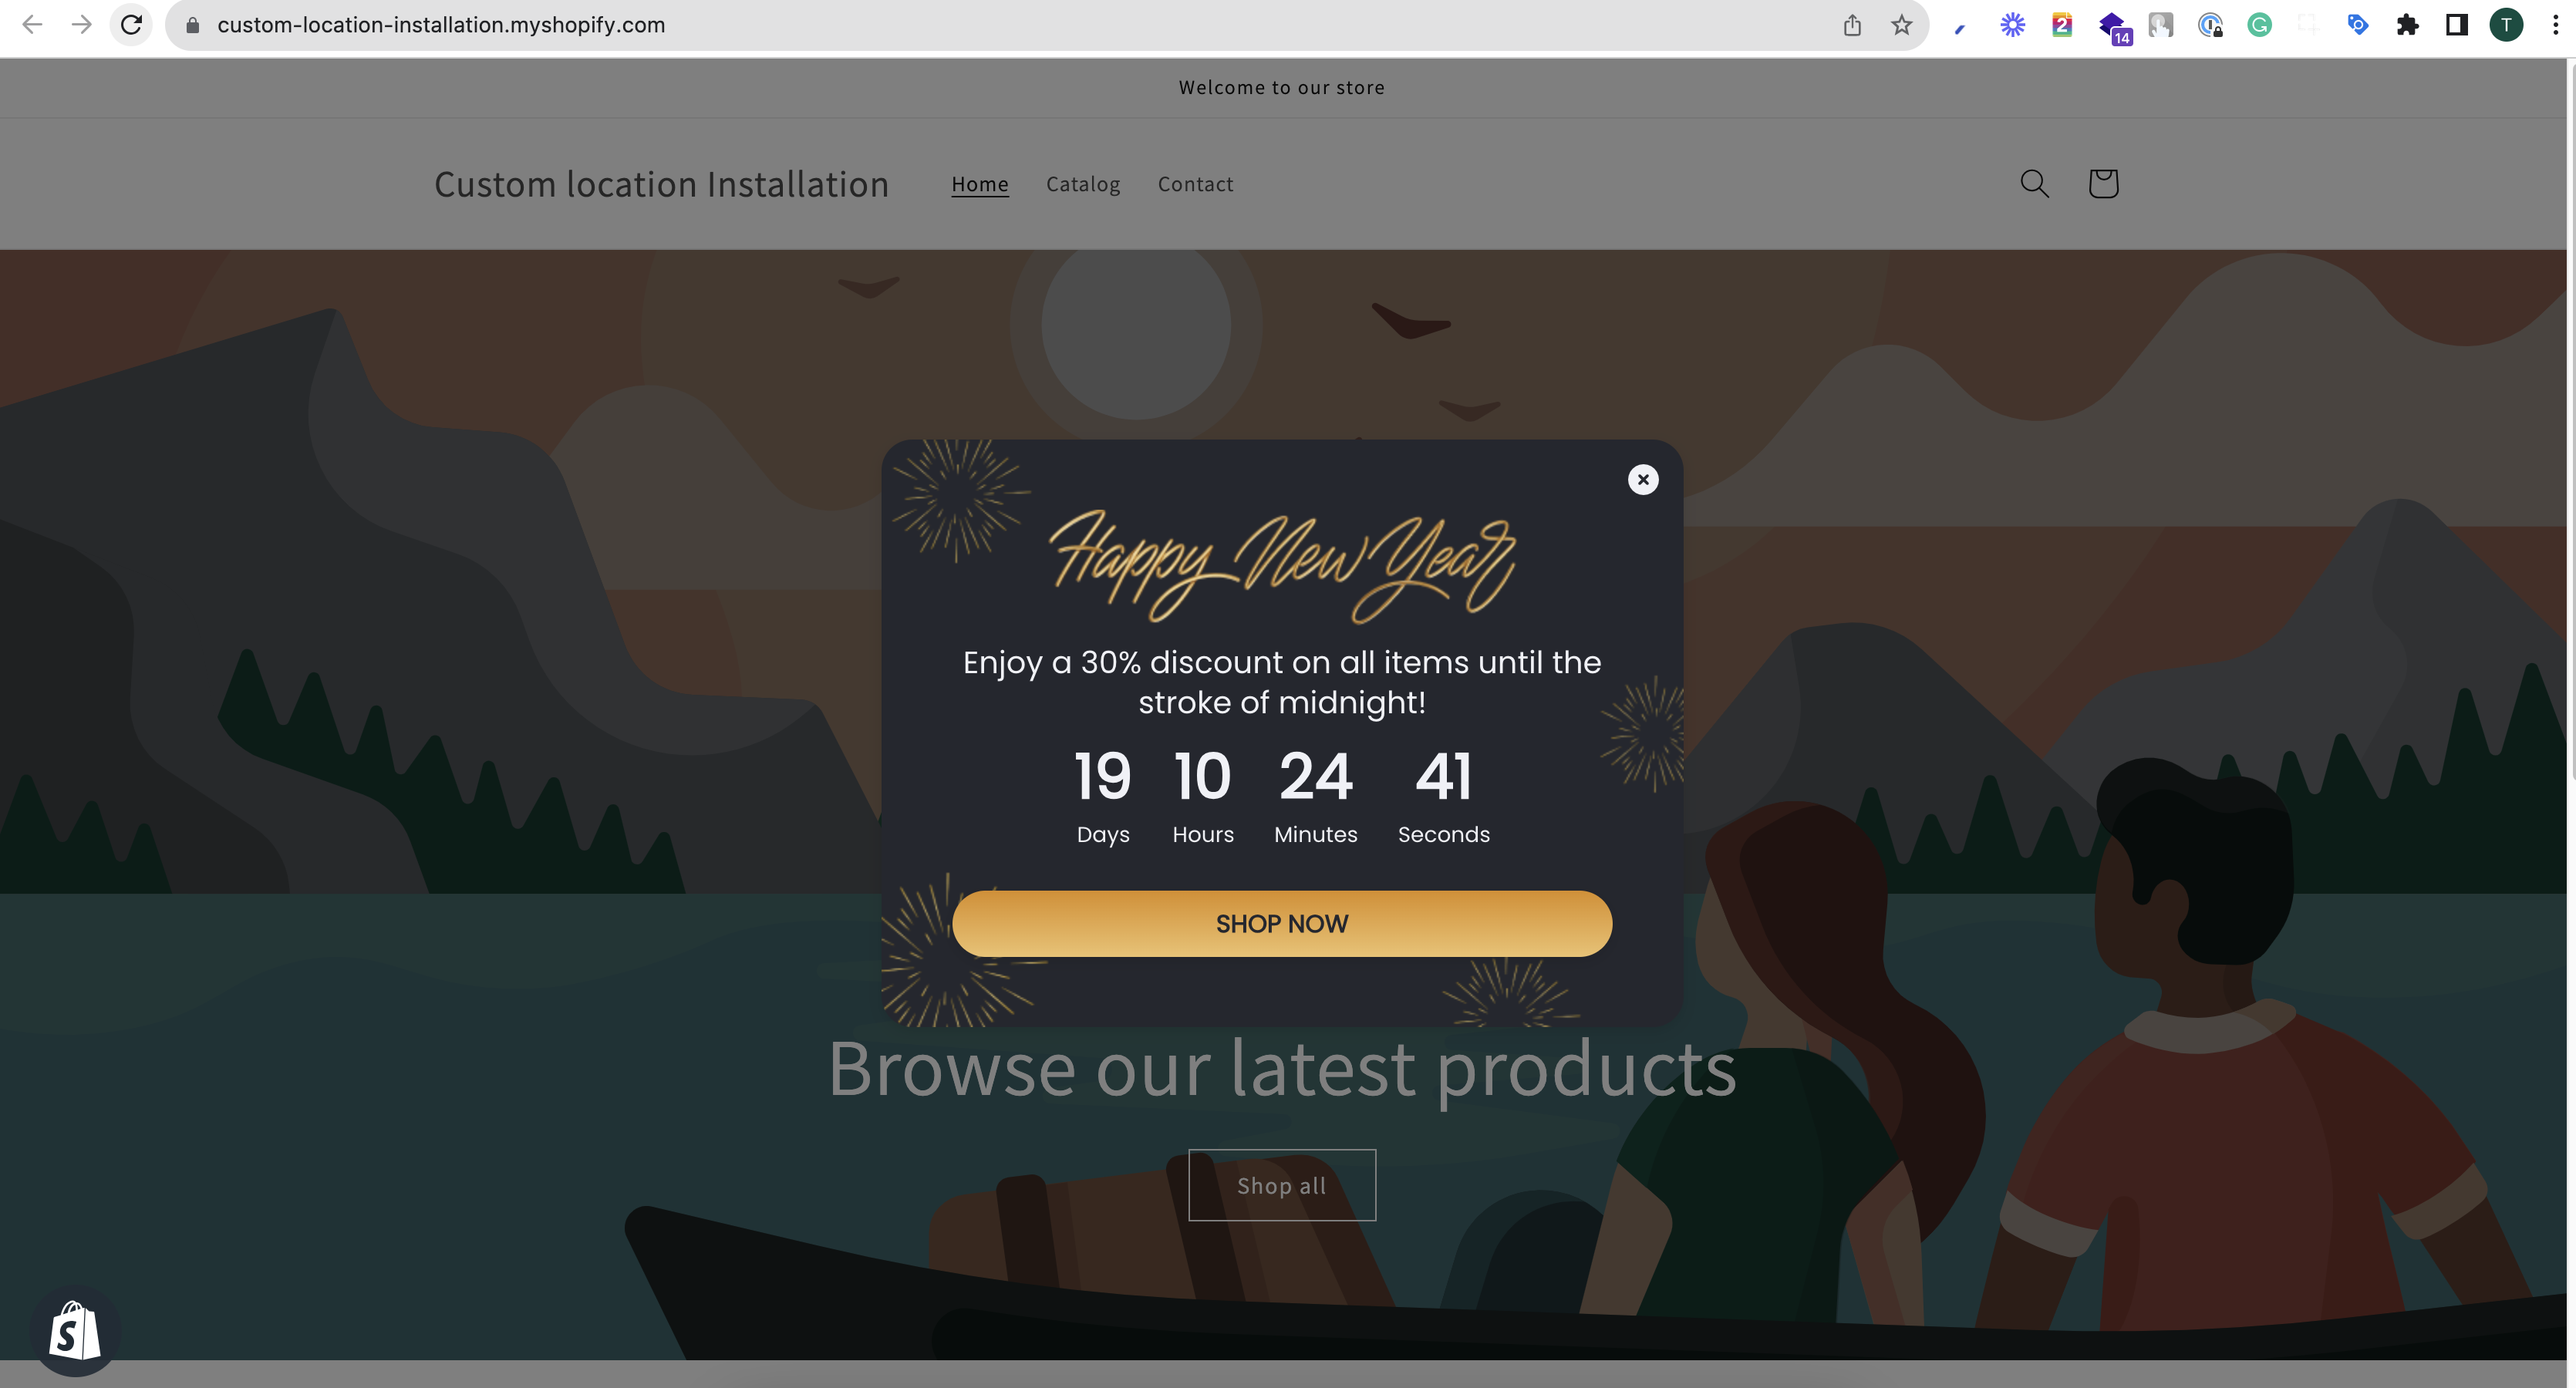
Check your live store in a new Incognito window and confirm the app shows.
How to Install a POWR App on a Single Blog/Product/Page
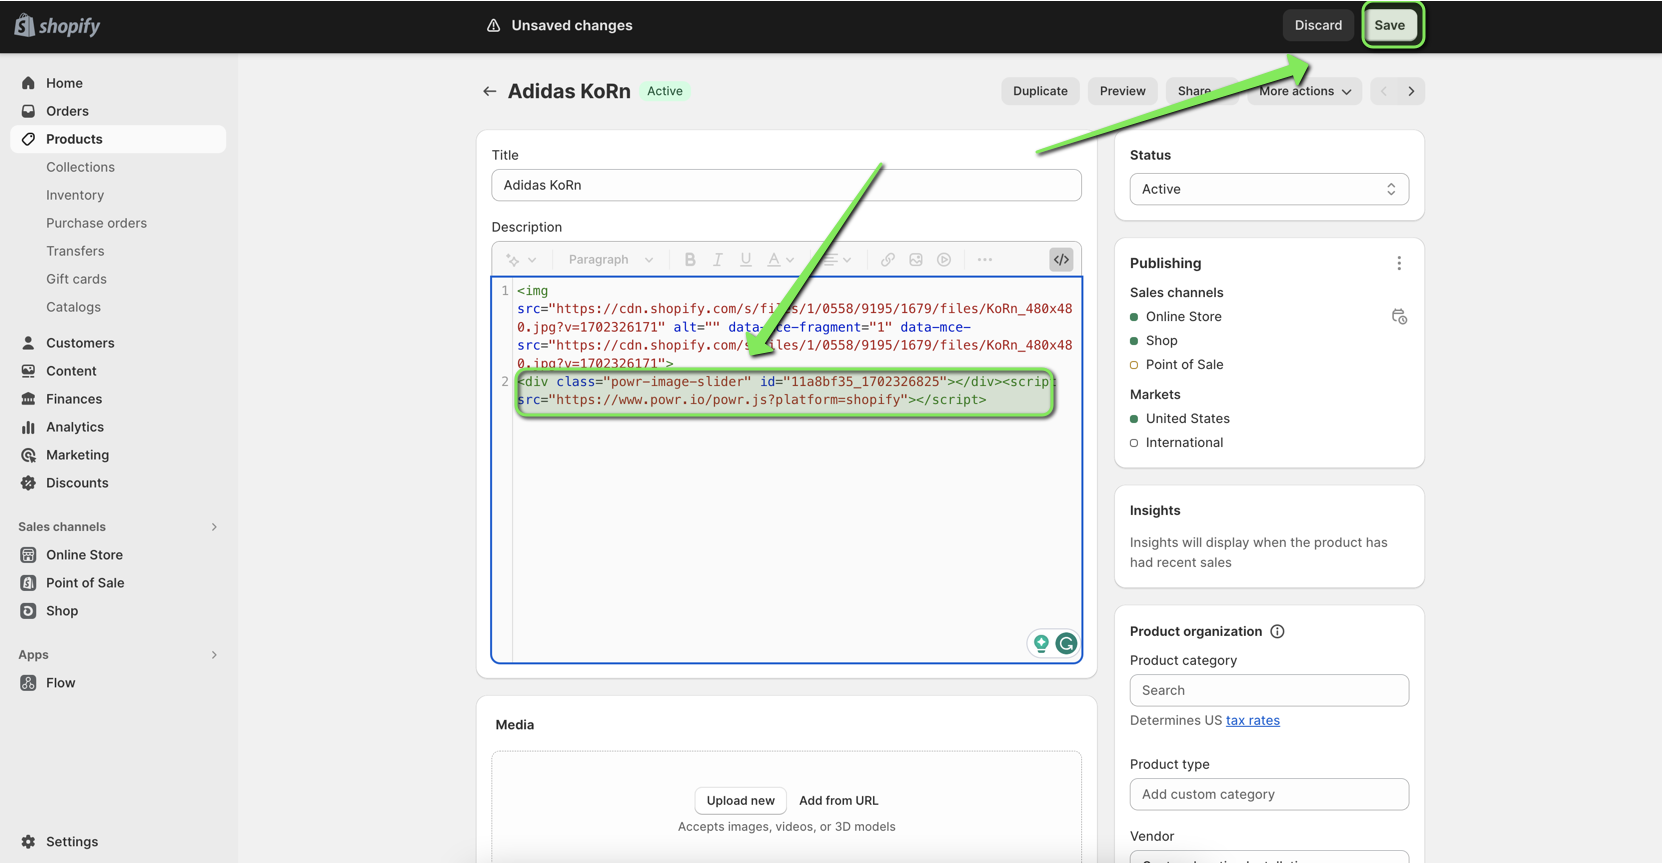
If you want to install a POWR app on a single custom page, please follow the instructions below. We will use installing to a blog page for the example screenshots below.
After you've finished customizing your app,
Click the 'Publish' button in the top right corner
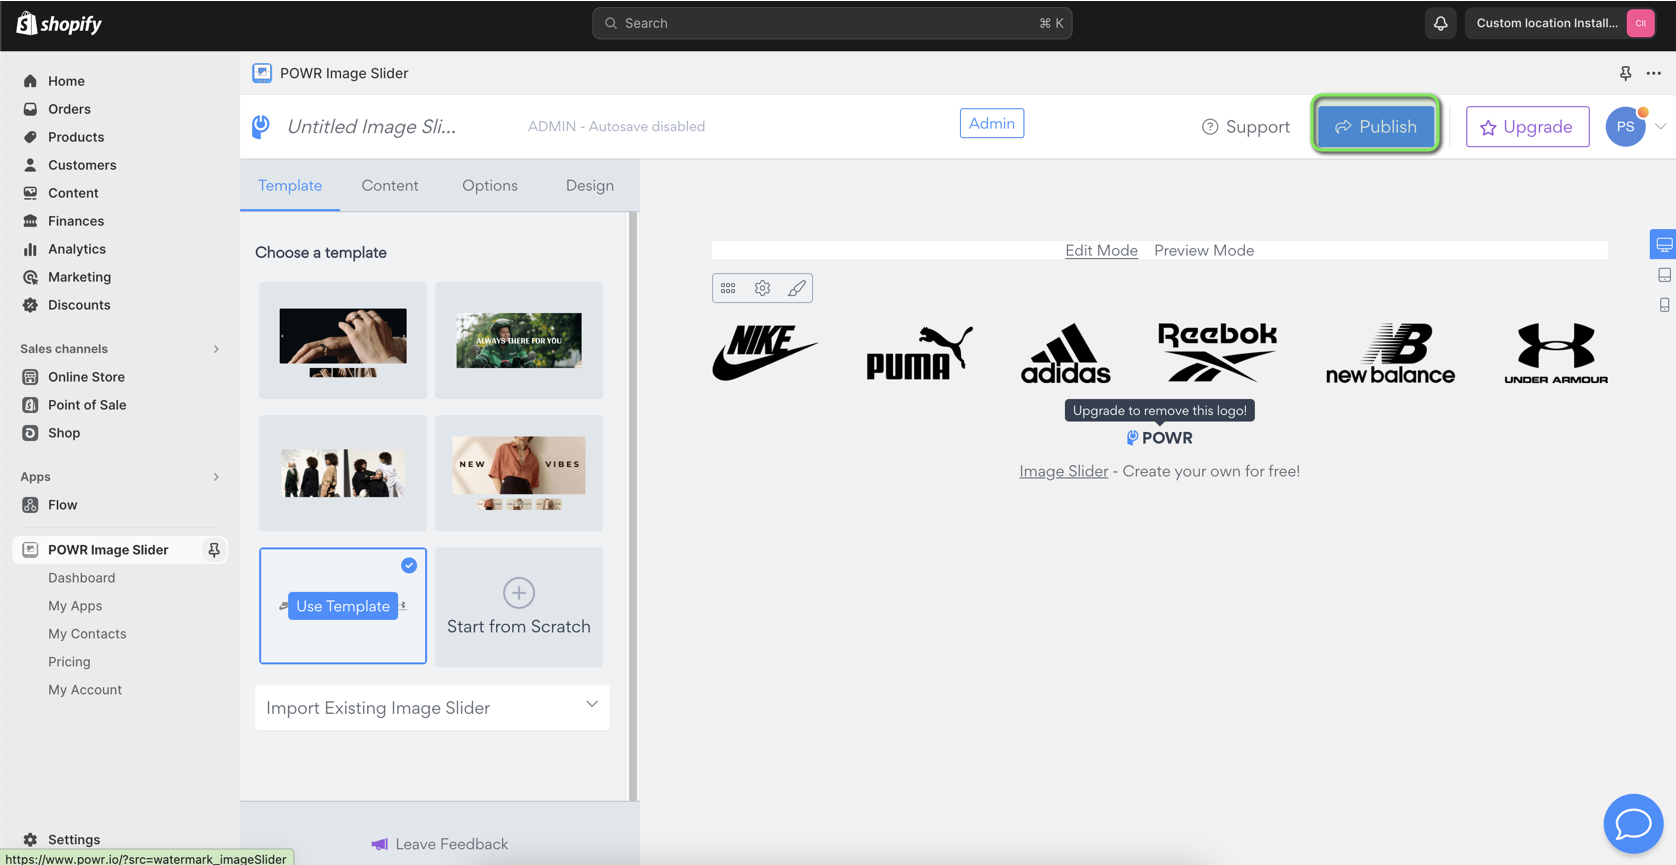
Choose 'Install to Custom Location'
Click 'Copy Code'
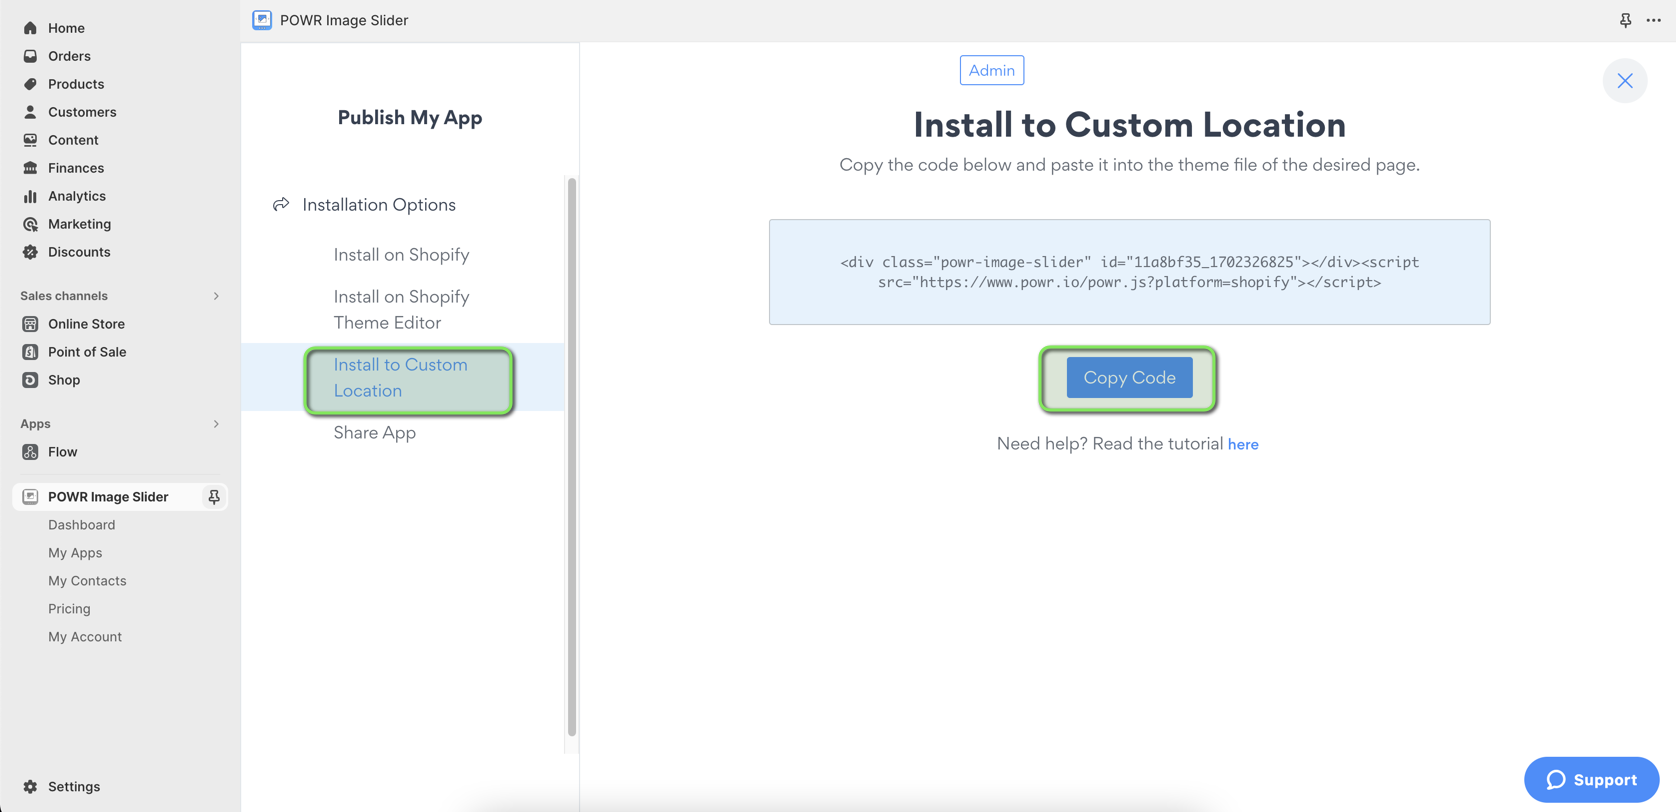
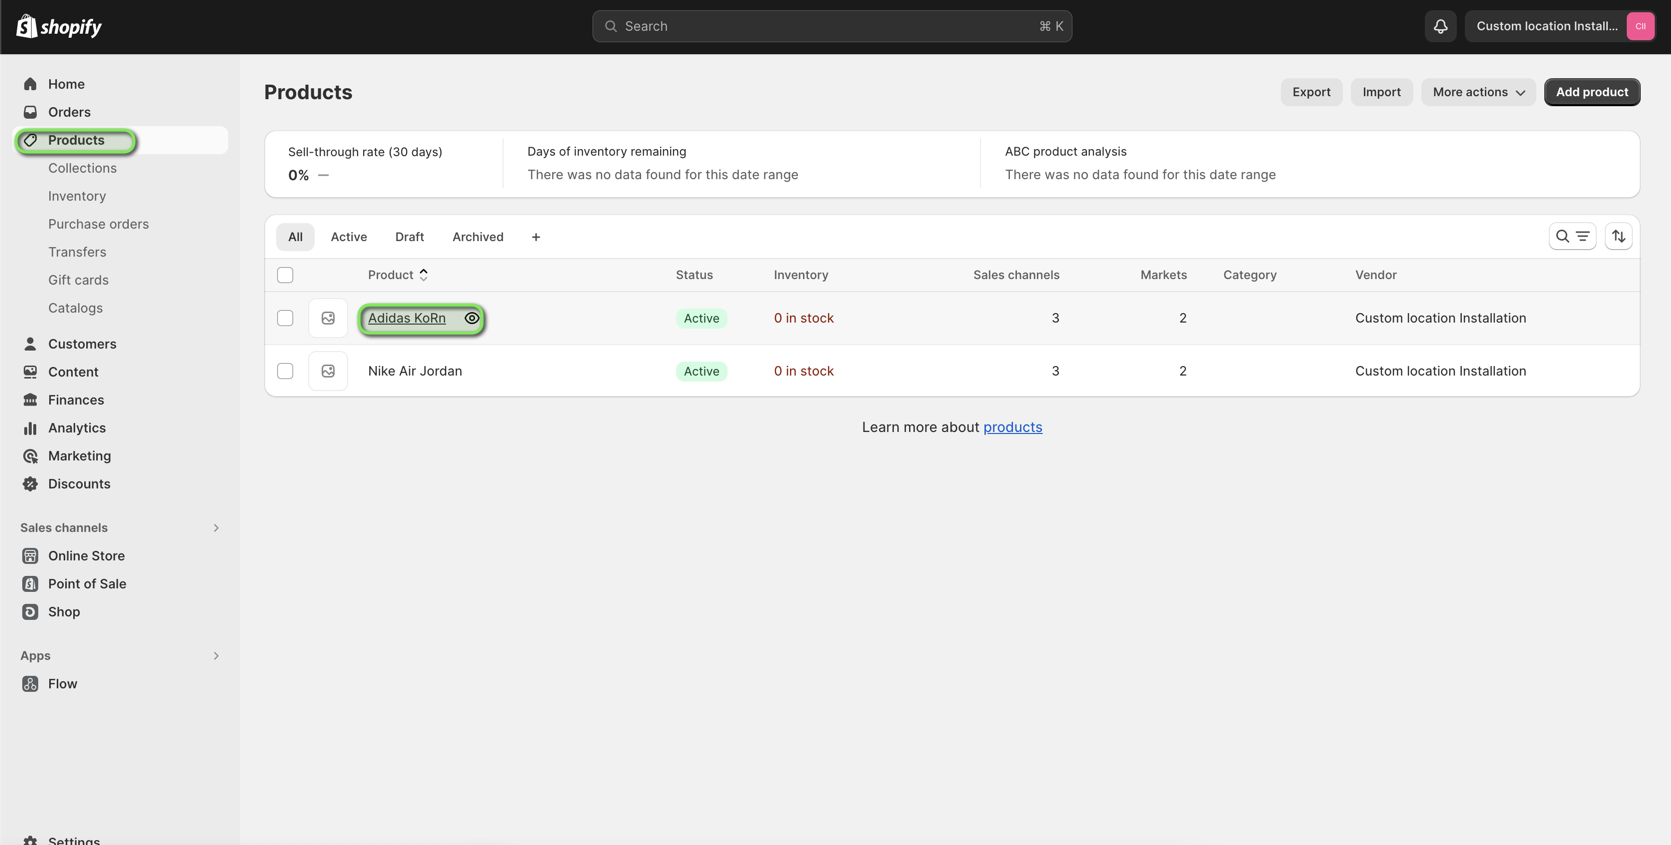
From the Shopify admin in the left navigation:
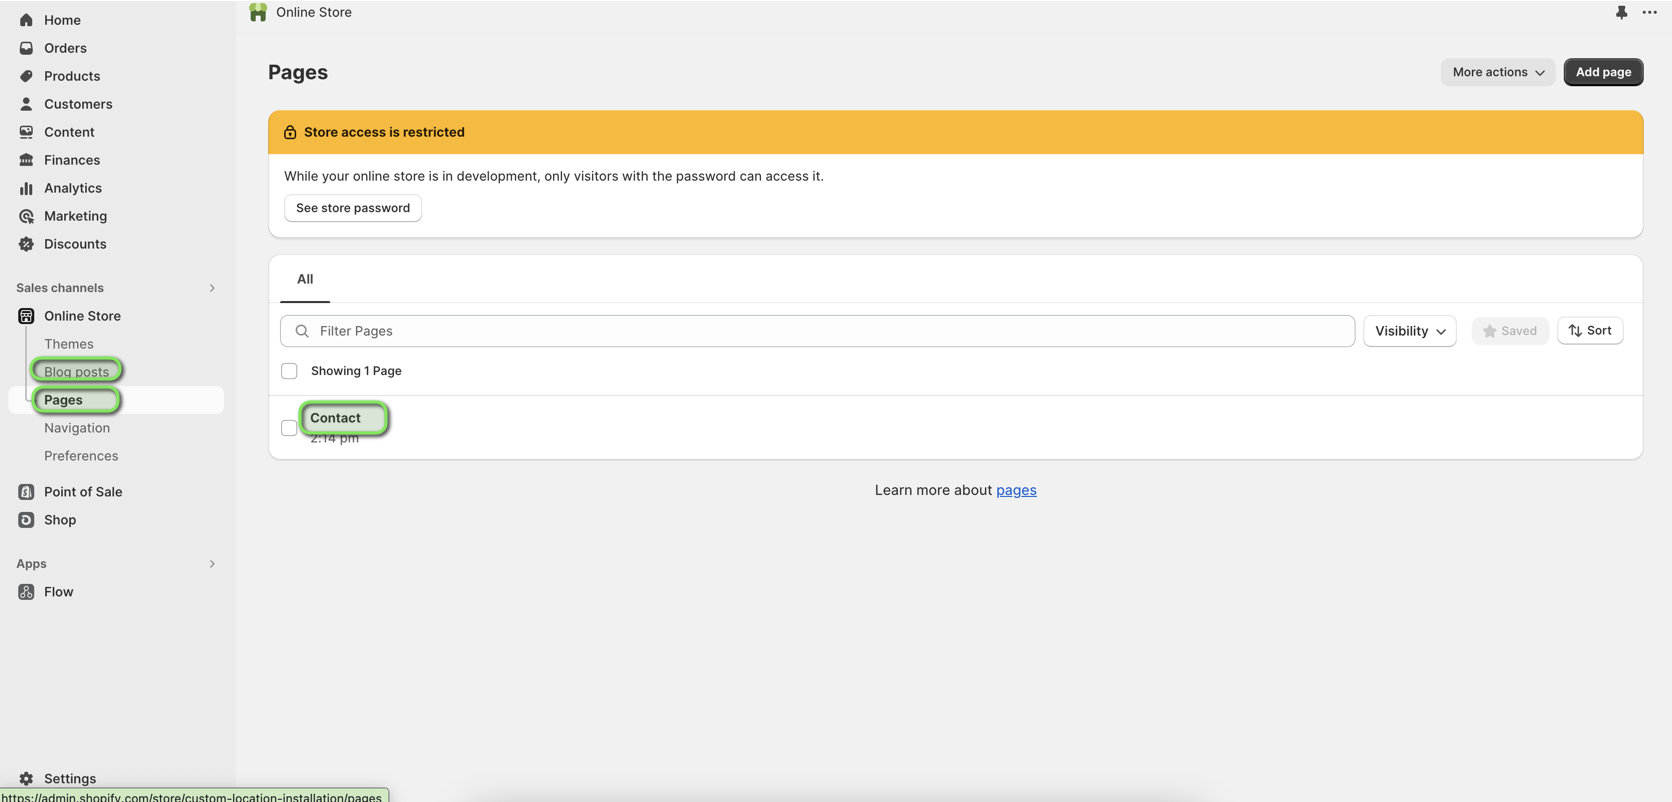
Go to your Page/Product/Blog
Open the HTML editor
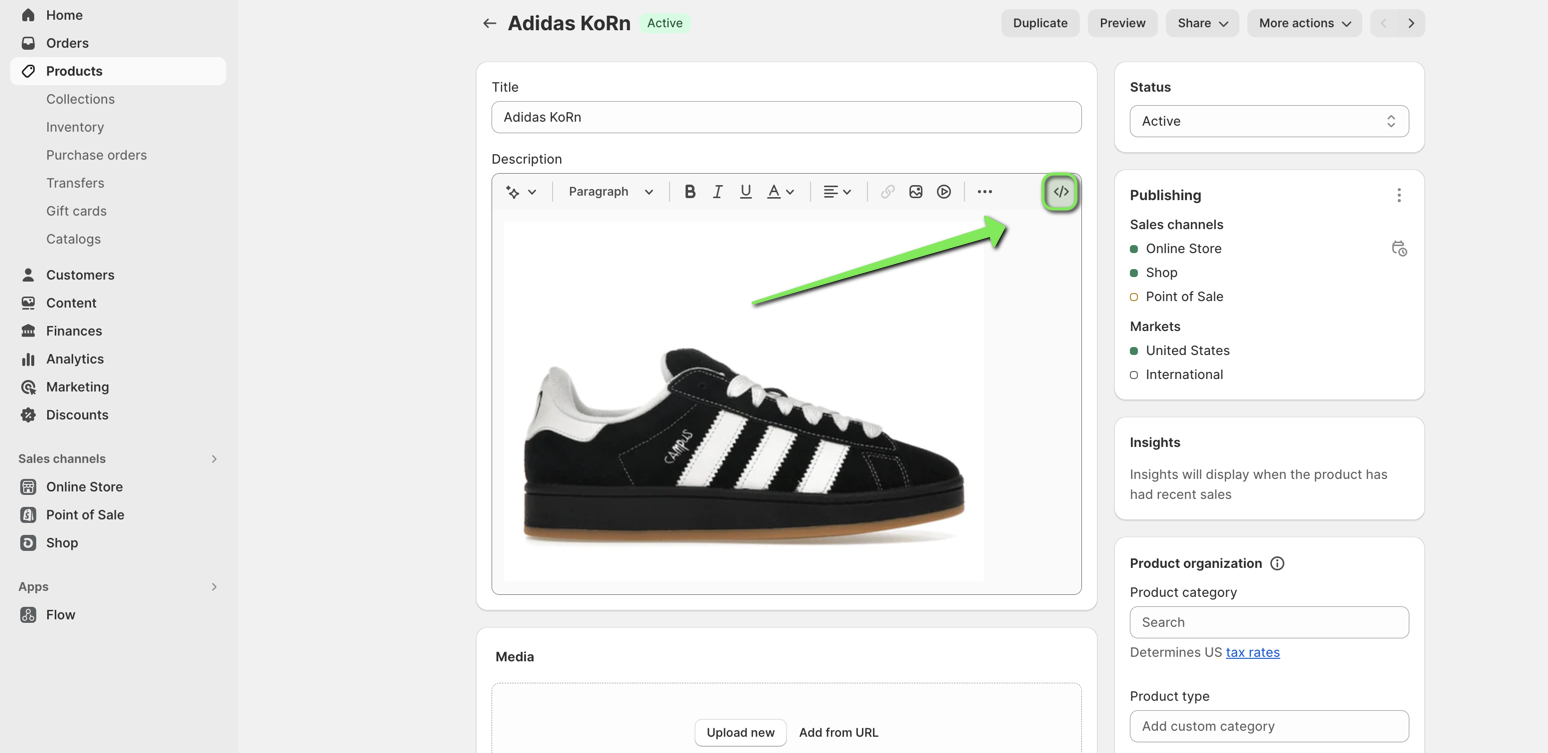
Paste the POWR embed code
Click 'Save'
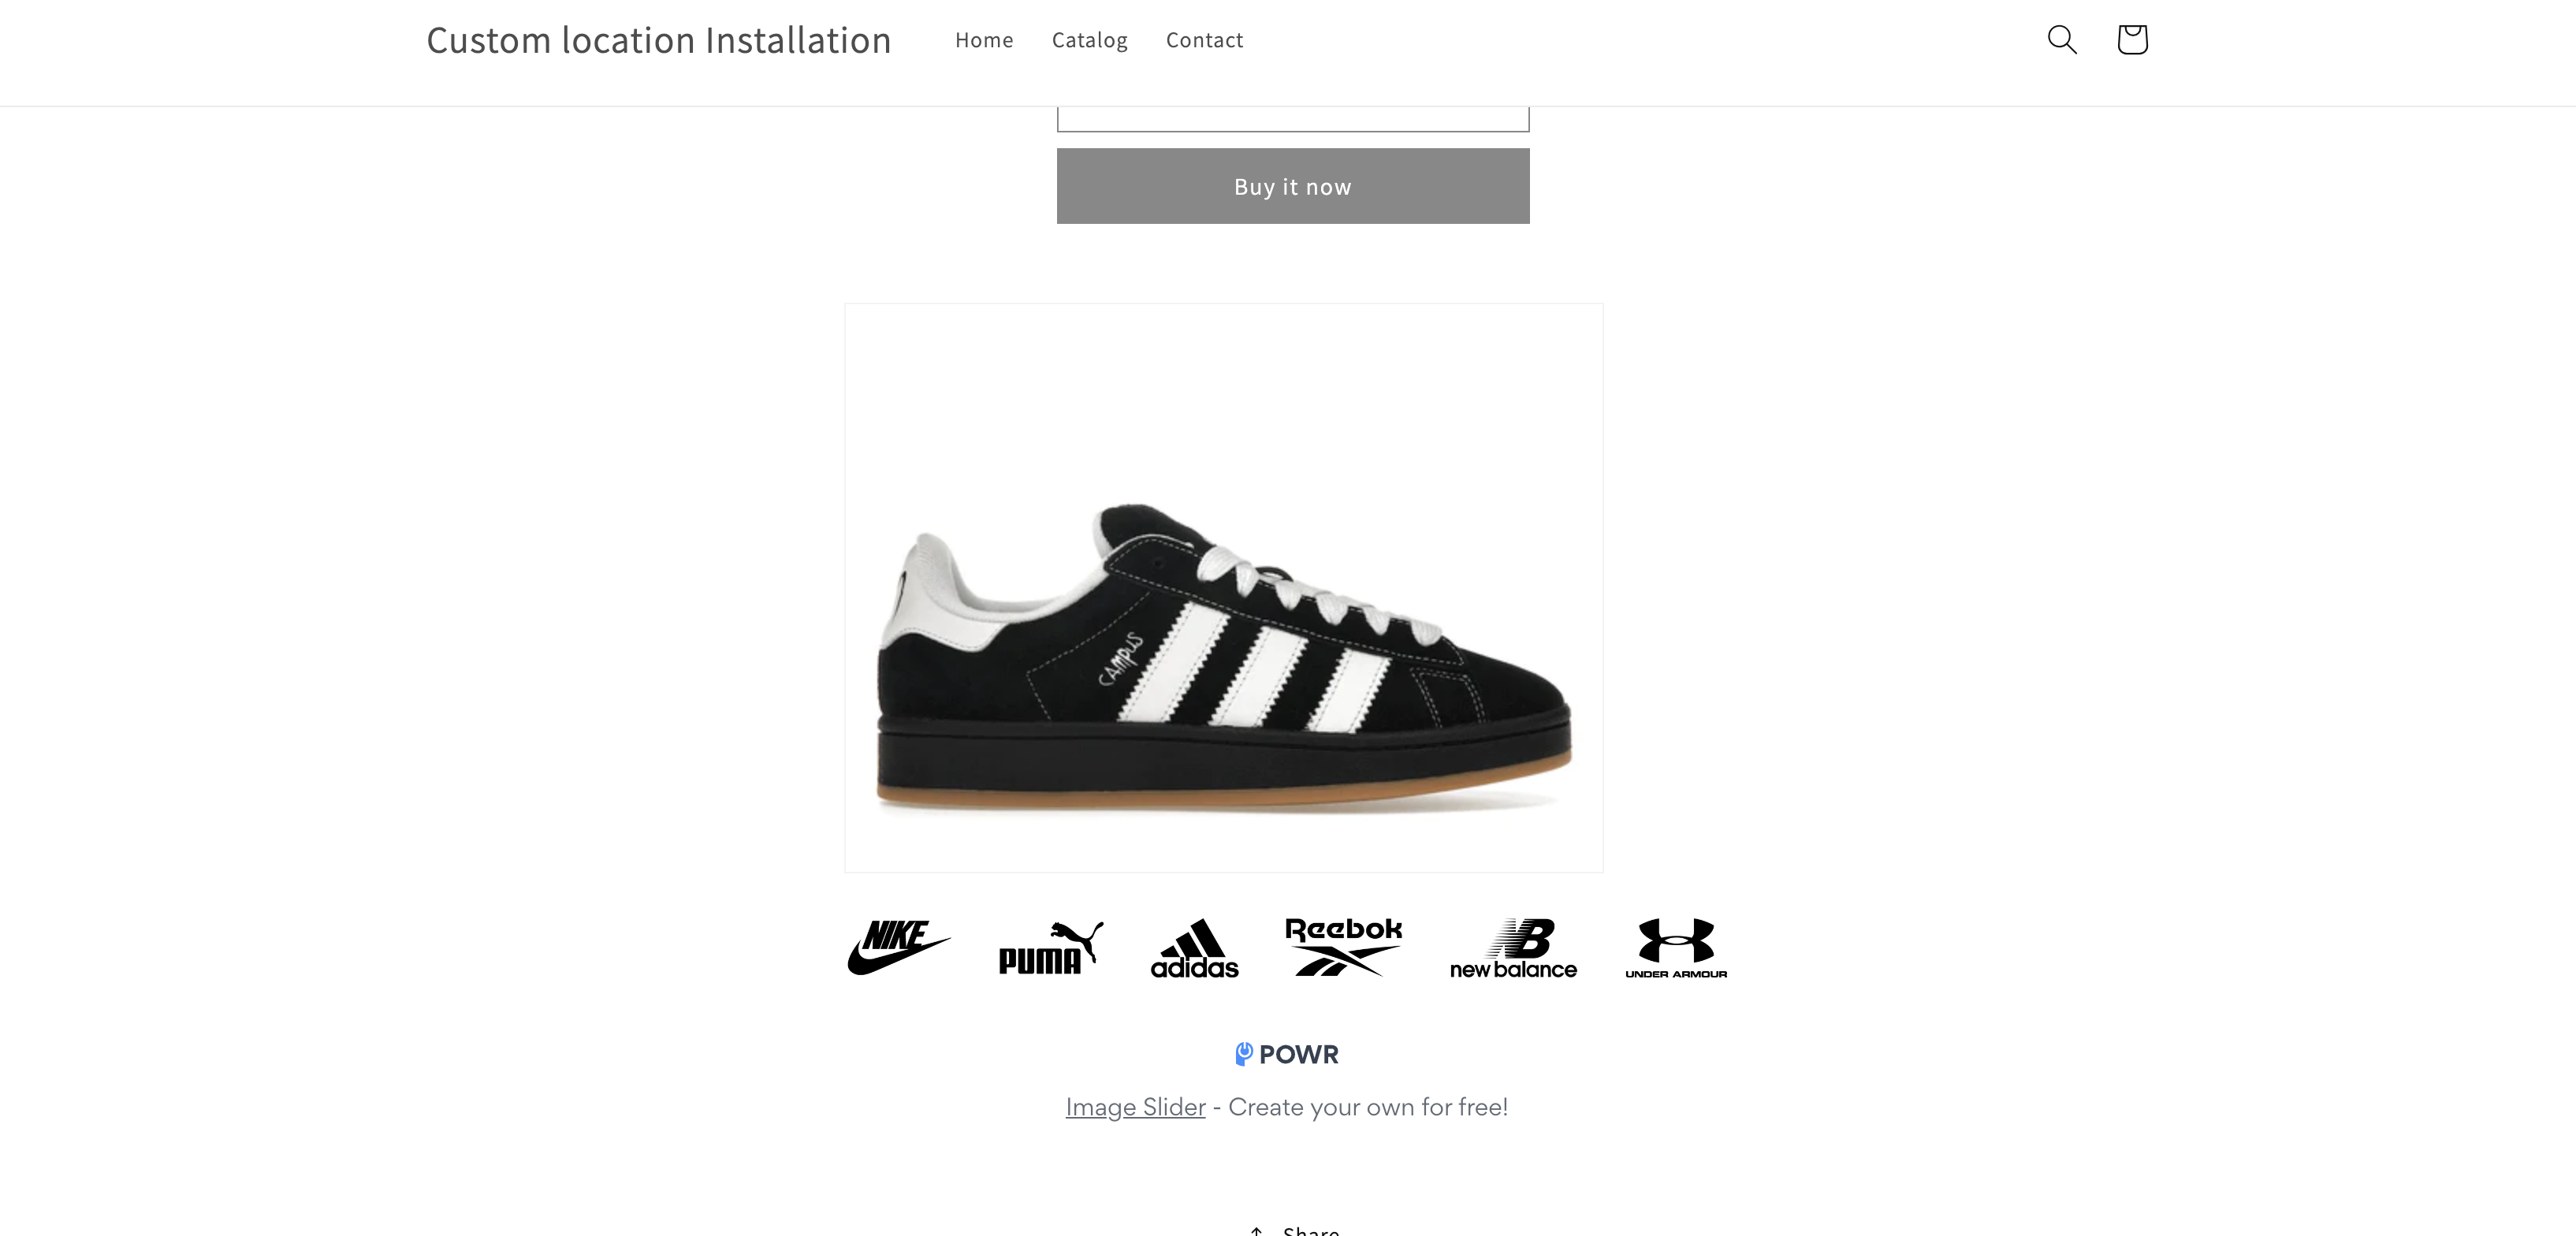
Check your live store in a new Incognito window and confirm the app shows.
Note: Be advised that all codes installed manually should also be deleted manually.
Note 2: Deleting the POWR app from the POWR dashboard or uninstalling the POWR app from the store will make the app disappear from your live site, but the POWR code will remain in your online store's code.
Need Help?
If you need any help or have any questions about our Form Builder, our support team is happy to help.
👉 Contact our support team
When contacting us, you'll be prompted to authenticate your email by signing in, and a confirmation code will be emailed to you. This helps ensure our support team's reply will be delivered to you with no issues.
For more information about available features, visit our Pricing Page:
https://www.powr.io/pricing