
Intro to POWR Galleries
Getting Started
POWR Galleries are a quick easy way to display photos and videos on any website. You can add captions, blocks of text, links, and even buttons to collect payments.
To create a new gallery, log in to your POWR.io account, click on Create New, and select Media Gallery from the popup. Or just click here. A new page will appear where you can create your gallery.
The POWR Editor will appear on the left hand side of the screen. Here is where you will customize the content and design of your gallery. Once you're ready, you can add your gallery to your website, share it on social media or in an email, or just save it for later in your POWR account.
Basic Setup
Adding an Entry
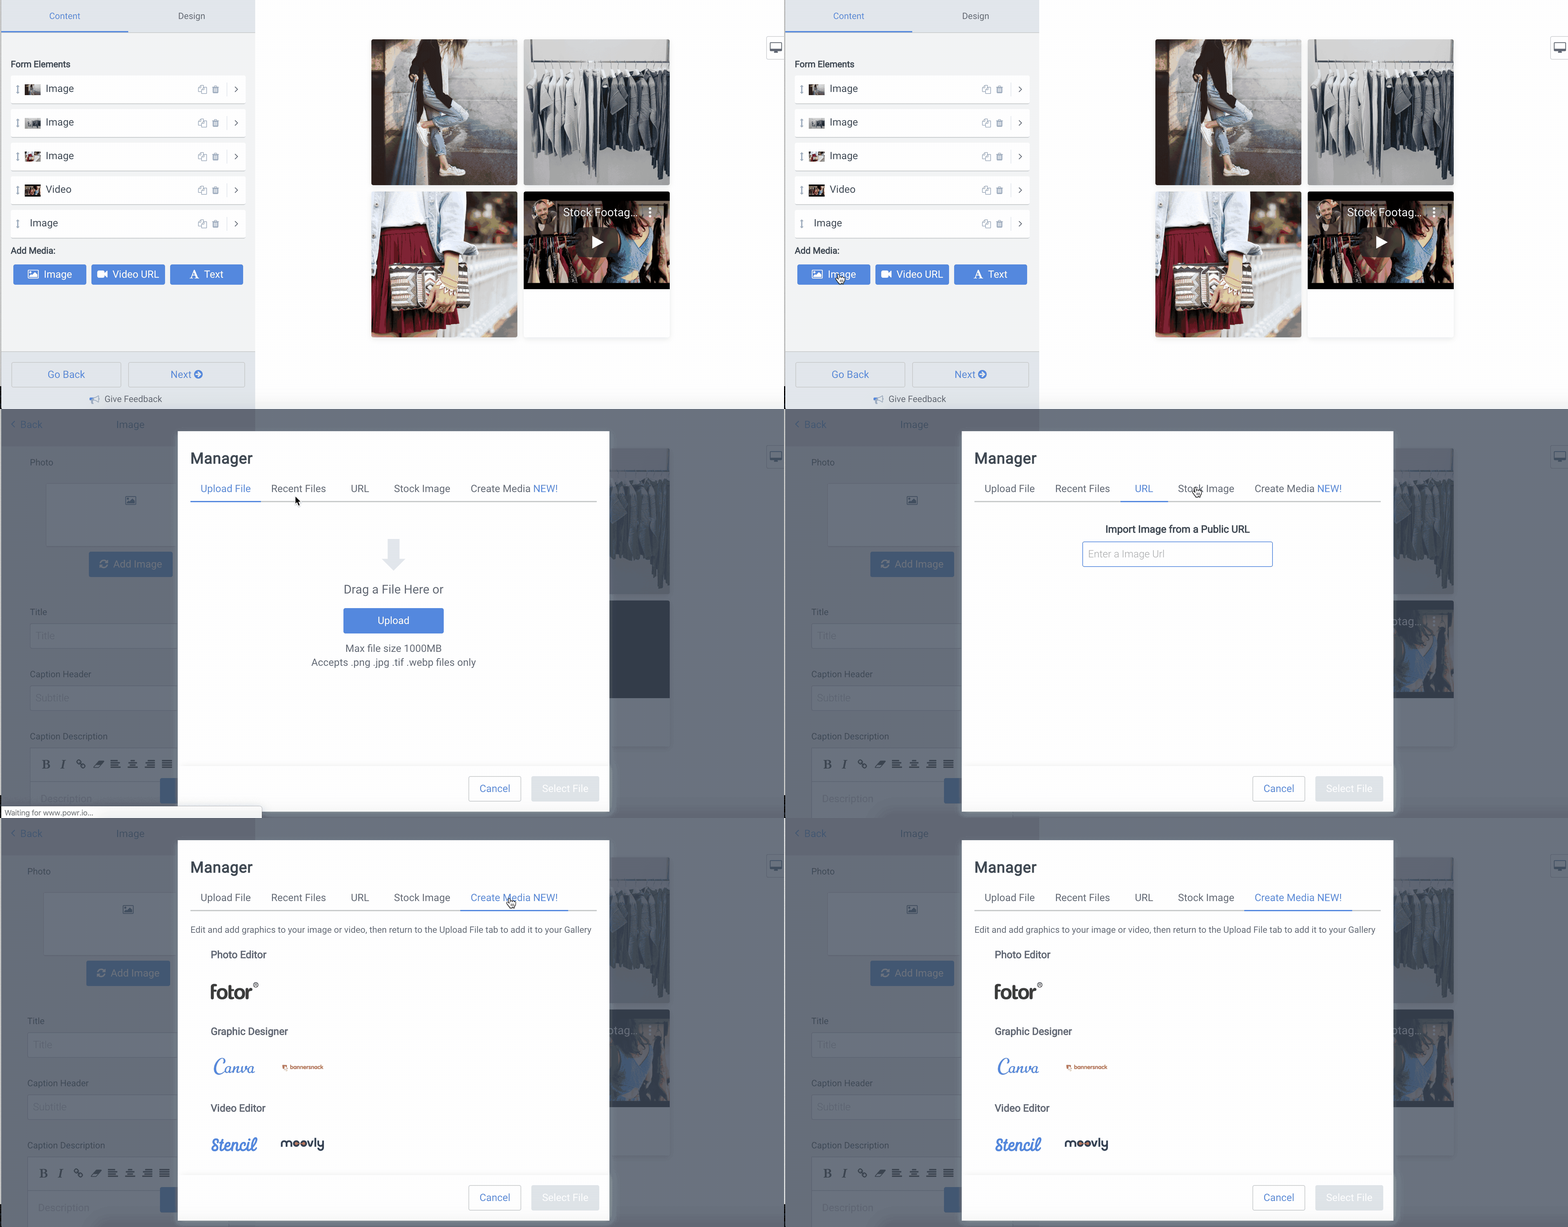
POWR Galleries come with several default entries. You can remove these in the POWR Editor by opening the Content tab, and clicking the Trash icons in the top-right corner of each entry.
To add a new entry, click the Image, Video, or Text buttons. This will create a new photo, video, or text-only entry to your gallery.
Common Questions
- How do I add an image to an entry?
- How do I rearrange entries?
- How do I adjust the width of a gallery?
- How do I add a video?
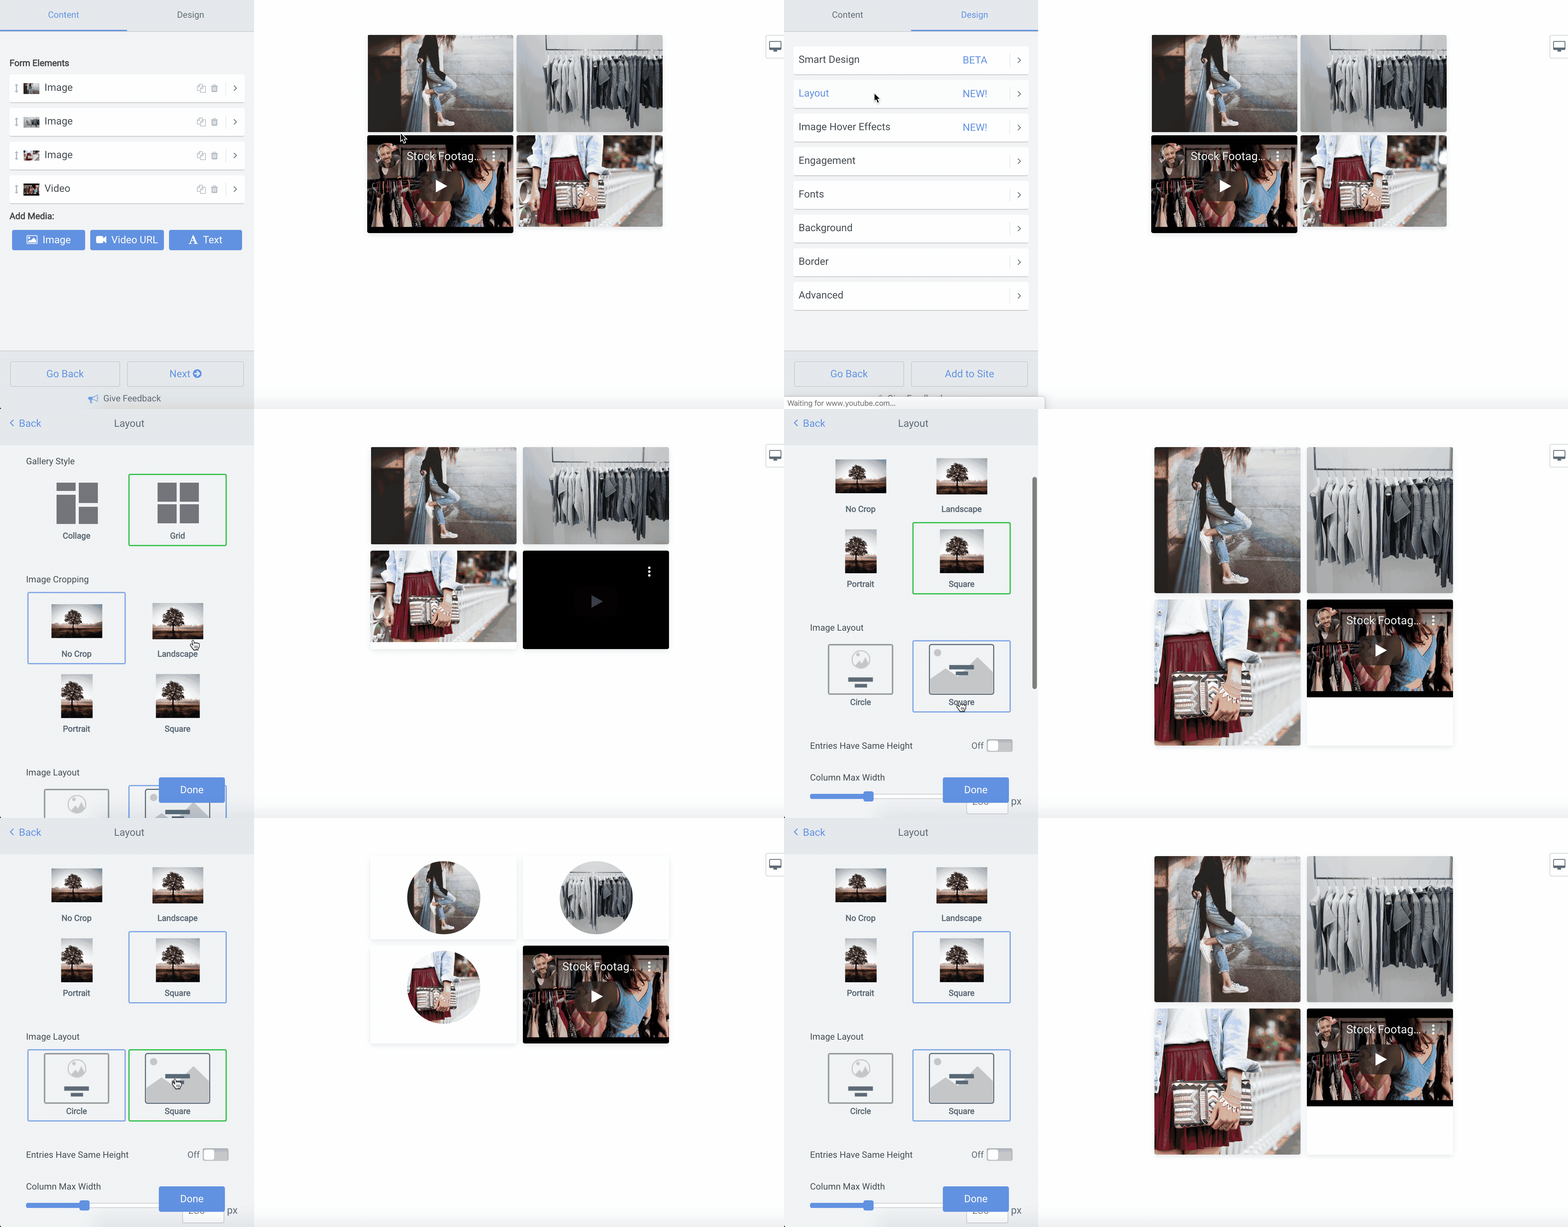
Easy Layouts & Image Cropping
POWR Galleries allow you choose your preferred layout style between collage or grid. It's also easy to crop all your gallery images automatically so that they all have the same dimensions, whether you prefer square, portrait or landscape. You can also easily make your images circles or square. Find all these options in the Design tab under Layout.
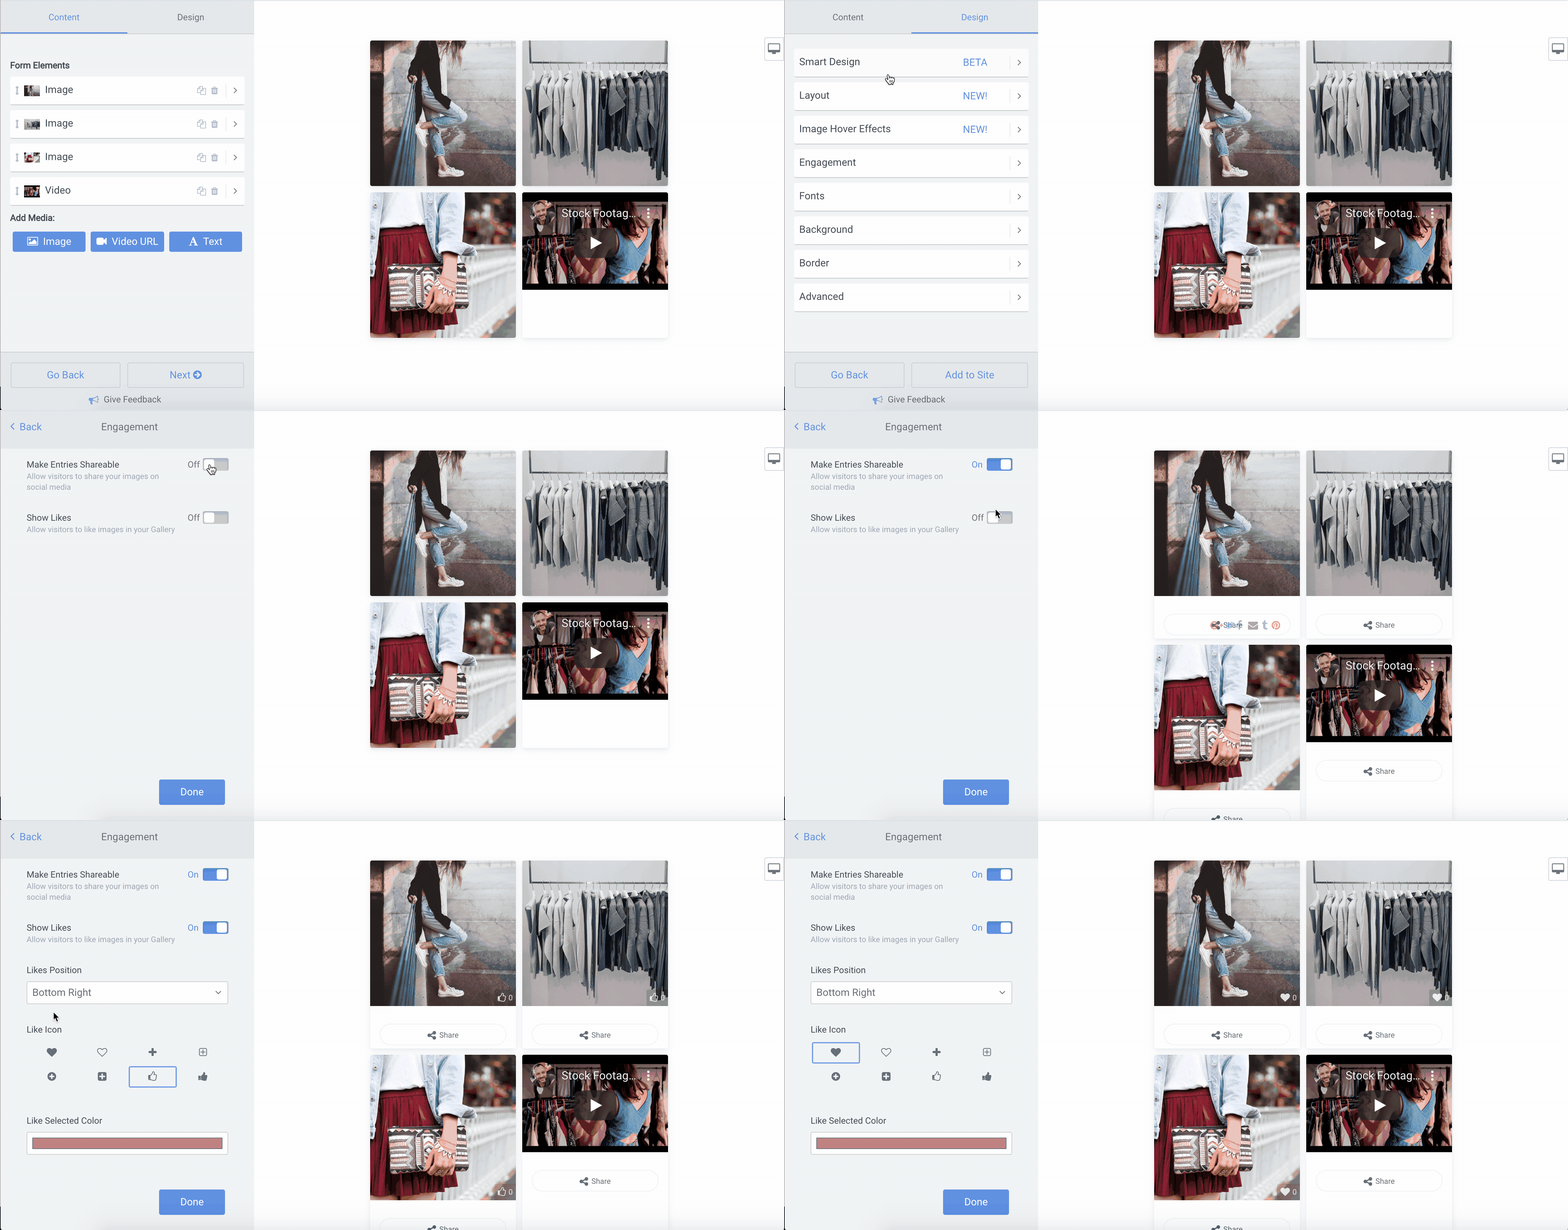
Enable Image Likes
POWR Galleries allow you to display image likes on your gallery images or videos, so you can show off how popular they are. To turn on image likes, go to the Design tab and select Engagement. You'll see a toggle for Show Likes. Turn this on, and you can choose the position and icon for image likes that will appear on each entry on your Gallery.
Enable Social Sharing
POWR Galleries allow your visitors to share entries on their own social media accounts, like Facebook, Twitter, and Pinterest. To turn on social sharing, open the Design tab and select Engagement. You'll see a toggle for Make Entries Shareable. Turn this on, and social sharing buttons will appear beneath each entry on your Gallery.
Note: This is a premium feature and requires a Pro or Business upgrade.
Common Questions
- More info on social sharing
- Can I share my entire Gallery on social media?
- Can I show the videos in a carousel with the Gallery app?
Advanced Options
- How can visitors search my Gallery?
- Can visitors add photos to my Gallery?
- Can my visitors right-click to download images in my gallery?
Examples:
Caption Description & Button Design in Media Gallery
To change the button background color or button text color please open app settings > Design > Caption:
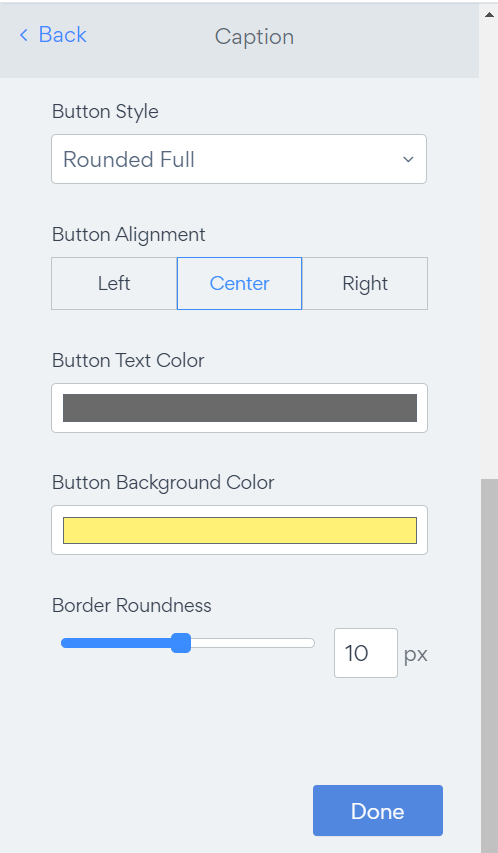
To change the font/color/background of your caption descriptions, simply follow these steps:
- Open your App Dashboard;
- Go to Design > Caption;
FIX: BROKEN_ATTACHMENT (original: /attachments/token/ayTO9NUhMeeeUnlIm4BVYUn7o/?name=inline1105504235.png)
- Find Caption Background Color and Caption Description settings;
FIX: BROKEN_ATTACHMENT (original: /attachments/token/bXFvC5K9msk9TZhwr4ehqaLMN/?name=inline-56147404.png) FIX: BROKEN_ATTACHMENT (original: /attachments/token/1mQavfFGaeOOxLZtVLVfYDoW9/?name=inline1301514358.png)
- Customize them;
- Click Publish to save your changes.
FIX: BROKEN_ATTACHMENT (original: /attachments/token/nt9h8MMCueGLFSYjiExDOflJo/?name=inline350904660.png)